Knowledge Base › CHAX 11 › Getting started
Get started with CHAX 11
Install CHAX 11, run first-run setup, sign in, find your way around Home, and upgrade from CHAX 10.
Windows and macOS6 guides


Knowledge Base › CHAX 11 › Getting started
Install CHAX 11, run first-run setup, sign in, find your way around Home, and upgrade from CHAX 10.
See what CHAX 11 does, who the payee and payer are, and where to begin.
With your clients’ permission, CHAX 11 prints checks drawn on their bank accounts, so you collect payment without waiting for a check to arrive by mail. Enter the client’s bank details and the amount, review the check on screen, then print it on blank check stock with a laser printer. The bank’s MICR line is on the check, so you deposit it the same way as any other check.
Transactions keeps a record of every printed check. Open a check there to reprint it, export it as a PDF, or use it to start a new check.
CHAX 11 replaces CHAX 10. It’s a new app for Windows and macOS with a new database. Coming from the older version? Read Upgrading from CHAX 10.
These two words appear on almost every page.
| Term | Who it is | Where it appears |
|---|---|---|
| Payee | Your business, or the company you represent. | On the “Pay to the order of” line. The payee deposits the check. |
| Payer | Your client, who is paying you. | The check is drawn on this person’s bank account, with their permission. |
First-run setup makes your business the default payee. Add your clients under Records → Payers.
The sidebar groups every page into three sets. Your edition and user role decide what you see, and CHAX hides any page or quick action they don’t include.
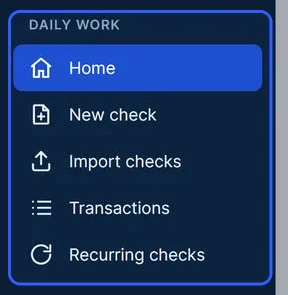
Write, print and look up checks here, using Home, New check, Import checks, Transactions and Recurring checks.
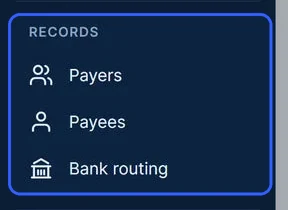
This group holds Payers, Payees and Bank routing. Bank routing is a directory of about 29,700 banks that supplies a bank’s name from its routing number.
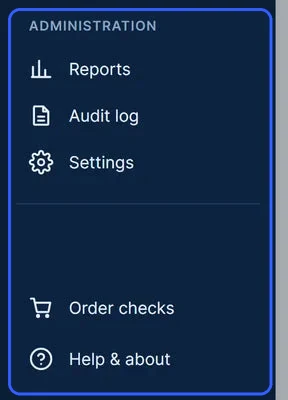
This group holds Reports, Audit log and Settings. Two more items sit at the bottom of the sidebar. Use Order checks to order check stock, and see CHAX pricing for prices. Help & about holds the built-in help and diagnostics.
For the full comparison, read Editions.
A single SQLite database file on the computer holds all of a company’s checks, payers, payees and users. The default location on Windows is %LocalAppData%\CHAX\chax.db. On macOS it’s ~/Library/Application Support/CHAX/chax.db. CHAX makes an automatic backup every day, and before upgrades, restores and moves.
Several PCs can use one company database. One PC shares it in host mode, and the others connect over the office network. Every edition includes host mode, and each PC uses its own license. Read Host mode.
CHAX lays out checks at full size and prints them at 100% scale. The MICR line uses the E-13B font that bank sorting machines read.
Confirm your computer and printer are ready, then install CHAX 11 and open it for the first time.
| Windows | macOS | |
|---|---|---|
| Operating system | 64-bit Windows 10 or Windows 11 | Apple silicon or Intel Mac |
| Other software | None. The installer includes everything CHAX needs, including .NET. | None |
| Rights to install | Administrator rights. Windows requests them during setup. | |
| License | Standard, Professional, Enterprise, or trial mode | Trial mode |
| Importing CHAX 10 data | Yes | No. Run the import on Windows, then move the database. |
Use the download link in your trial or purchase email, and choose Download for Windows. The file has a name like CHAX-11.1.0-x64-Setup.exe.
Open the file and approve the administrator rights request. Windows shows the program as CHAX 11, signed by Chax Software. Work through the setup screens. The suggested folder is Program Files\CHAX 11, and you can pick a different one.
On the final screen, keep Start CHAX 11 ticked and choose Finish. Setup also places a CHAX 11 shortcut on the desktop and in the Start menu.
When CHAX opens for the first time, it takes you through your database, business, printer and account. Follow First-run setup.
Run the newer setup program on top of the installed one. It replaces the program and leaves your database, checks and records in place. CHAX backs up a database before a newer version opens it for the first time.
Setup won’t put an older version over a newer one. It tells you: “A newer version of CHAX 11 is already installed.”
To get the macOS version, contact support@chax.com. It prints through the Mac’s own printing system. On a Mac, CHAX 11 runs in trial mode, so your checks print as DEMO checks.
Program files and data live in separate places. The program goes in Program Files\CHAX 11. Each company has one database file, in one of these default locations:
%LocalAppData%\CHAX\chax.db, for the Windows user who set it up.~/Library/Application Support/CHAX/chax.dbKeep this file on the computer. Don’t put it on a network share or in a cloud-synced folder. To share it with other PCs, use host mode.
The installer carries everything CHAX 11 needs, including its own copy of .NET 10, and shares nothing on the PC with other programs. On Windows and on macOS, the check prints at true size with no scaling from CHAX.
Work through the five setup steps that appear the first time CHAX 11 opens, covering your database, business, printer and administrator account.
Have your business name, address and phone number ready, and turn on the printer you’ll use for checks. Setup takes a few minutes. It opens on its own when CHAX starts on a database with no users.
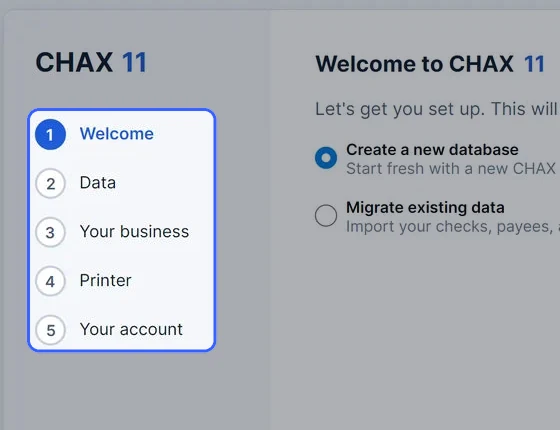
The left side of the window lists the five steps and marks your current one. Back and Next sit at the bottom right.
Select one of these options, then choose Next.

The Database file box shows the location of this company’s database. CHAX uses one database file per company. Keep it on this computer, not on a network share or in a cloud-synced folder.
To keep it elsewhere, move it later in Settings › Database & backup, which copies it safely.

Enter your business, or the company you represent. This is the payee, the name on the “Pay to the order of” line. Fill in Payee name, Phone number and up to four Address lines.
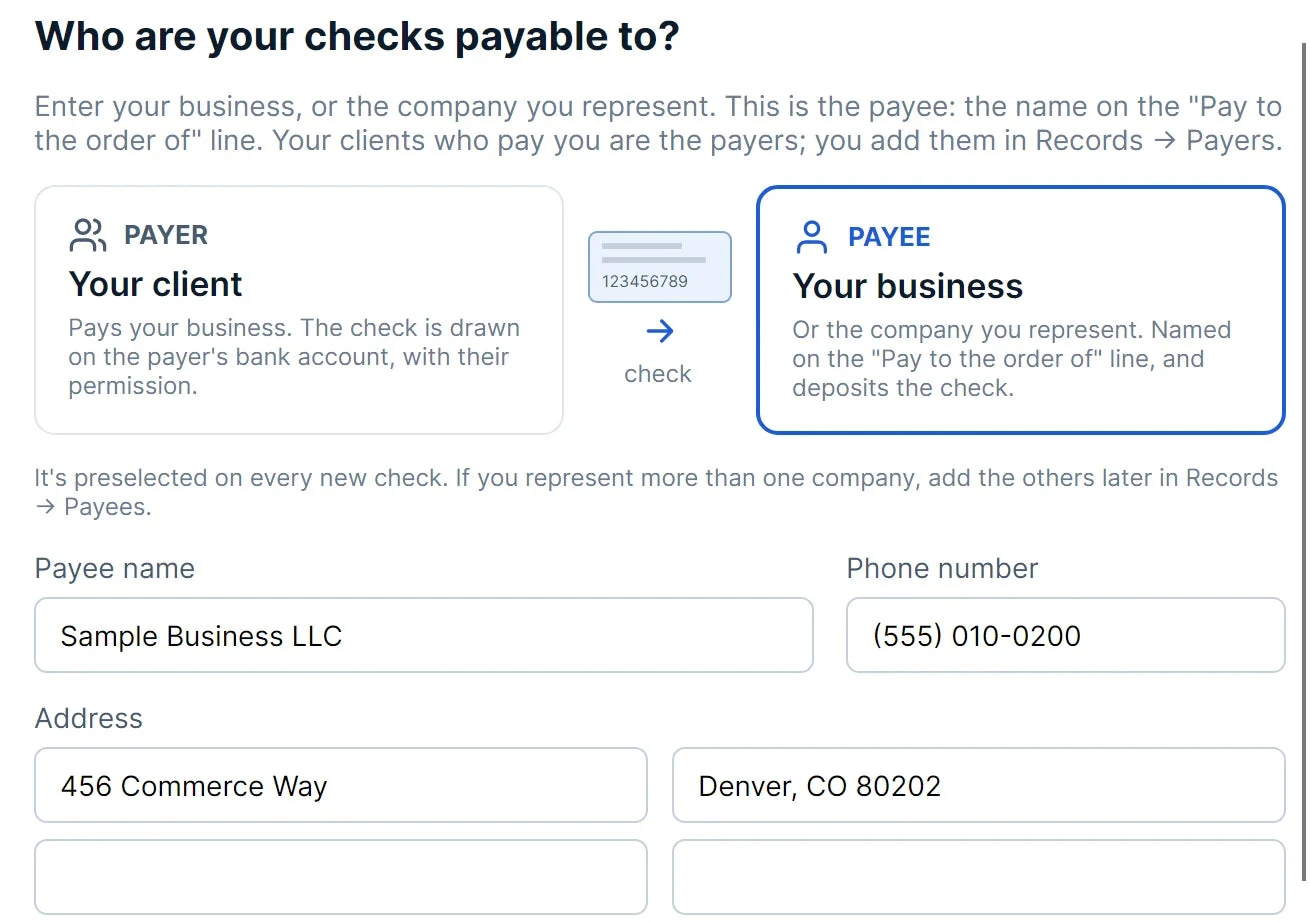
CHAX preselects this payee on every new check. The diagram is a reminder that your clients are the payers, and you add them later in Records › Payers. If you represent more than one company, add the others later in Records › Payees.
A Standard license allows one payee, and setup tells you this one appears on every check. You can leave the step blank and add your business later.
Select the Printer and the Tray with check stock. The tray list shows the trays of the printer you selected.
Load plain paper and choose Print test page to send a test check to that printer. CHAX tells you whether it was sent. You can fine-tune where fields land later in Settings › Check alignment.

On a new database, you become the administrator. Enter Your name, which appears on Home and in the audit log. Keep the suggested User ID or change it, then fill in Password and Confirm password. If you need help with your administrator sign-in, contact support.
A password needs at least 8 characters. It’s optional unless you tick the sign-in box.

Tick Require everyone to sign in when CHAX starts if more than one person uses this PC. If you leave it clear, CHAX opens as the administrator with no prompt. You can change this and add users later in Settings › Users.
Under Open CHAX on, pick Home or New check. Tick Show the check preview on the left of New check if you want the preview on that side. Choose Finish.

When you choose Finish, CHAX creates the administrator first, so nothing is saved until the account details are right. It then saves the default payee, the printer and tray, and your start screen and preview choice. These are recorded in the audit log.
| Message | What to do |
|---|---|
| Enter a user ID for the administrator. | Type a user ID. |
| Enter your name. | Fill in Your name. |
| Use at least 8 characters for the password. | Lengthen the password. If you don’t require sign-in, you can clear both password boxes instead. |
| The passwords don’t match. | Enter the same password in both boxes. |
To change the default payee or check printer, for example, an administrator can choose Help & about › Run first-run setup again. If the database already has users, setup offers Skip setup and doesn’t create a second administrator.
At each start, CHAX counts the users in the company database. With none, setup opens. With users, CHAX opens as the administrator if sign-in is off, or shows the sign-in page if it’s on.
Sign in to CHAX 11, set a first password if you moved from CHAX 10, and get back in after a password is forgotten.
Sign-in stays off until an administrator turns it on, either during first-run setup or later in Settings → Users. While it’s off, CHAX opens as the administrator with no prompt. Once it’s on, the sign-in page appears at every start and after Sign out in Help & about.
You also sign in again when the database changes underneath you, such as after a restore or a CHAX 10 import. A message above the form gives the reason.
Type your user ID in Username. CHAX fills in the last person who signed in on this PC. Then type your Password. The eye icon reveals what you typed.

Choose Sign in or press Enter. CHAX opens on Home or New check, depending on what your administrator chose.

The text under the button tells you what to do. The “Forgotten passwords” section below has the details.

The built-in help is behind sign-in, so the Help & support link opens CHAX support on chax.com.

CHAX won’t say which of the two entries was wrong. Check both, and check Caps Lock.

| Message | What to do |
|---|---|
| Enter your username and password. | A box is empty. Fill in both. |
| Unable to sign in. Check your credentials. | The username or password is wrong, or the user is turned off. Try again, or ask your administrator. |
CHAX 10 users keep their user ID and password. If a user had no password in CHAX 10, they choose one at first sign-in.
CHAX tells you the user “has no password yet (none was set in CHAX 10). Choose one to sign in.”
Enter a password of at least 8 characters in New password and Confirm password, then choose Set password. To return to the normal form, choose Back.
An administrator may have encrypted the company database. In that case, Unlock the database appears before anything else, including sign-in. It asks for a separate database password, not your user password.

Enter the database password your administrator set, then choose Unlock. If that password is forgotten, enter the recovery key saved when encryption was turned on. CHAX then asks you to choose a new database password. To set up encryption and the recovery key, read Database encryption.
CHAX can’t read an encrypted database, even its list of users, until it’s unlocked. That’s why the unlock screen comes first and sign-in second. A database without encryption only needs sign-in.
Passwords are case sensitive, and user IDs aren’t. CHAX stores only a salted PBKDF2-SHA256 hash of each password, so a password can be reset but never read back. CHAX 10 passwords are hashed during the import, and the plain text never reaches the new database.
The audit log records each sign-in with the user ID, the computer and the result, so an administrator can spot failed attempts.
Read Home at a glance: what you printed this month, what’s waiting, what’s due, and how much of your license you’ve used.
CHAX opens on Home, unless your start screen is set to New check. The line under the title greets you by name and shows today’s date. New check at the top right opens a blank check.
This switch is at the top right of every page, and the theme changes at once. The sun means light and the moon means dark. Check, print and report previews stay on white paper in both.

A banner gives the count when a recurring check is due or overdue, such as “3 recurring checks are due for review.” It also names each schedule within its reminder days, such as “Coming up: Office rent on Oct 21.” Choose Recurring checks → to open Recurring checks. With nothing due or coming up, the banner is hidden. Read Recurring checks.

This tile totals the checks dated this calendar month and counts the bank accounts they were drawn on.

This tile counts the checks in the batch, ready to print together. Choose Print batch now → to open it. Only editions with batch printing show this tile.

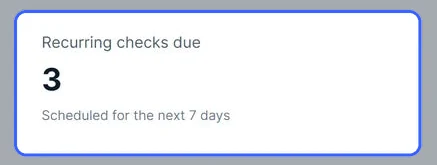
This tile counts active recurring checks with a next date in the next 7 days, including today and any that are overdue.
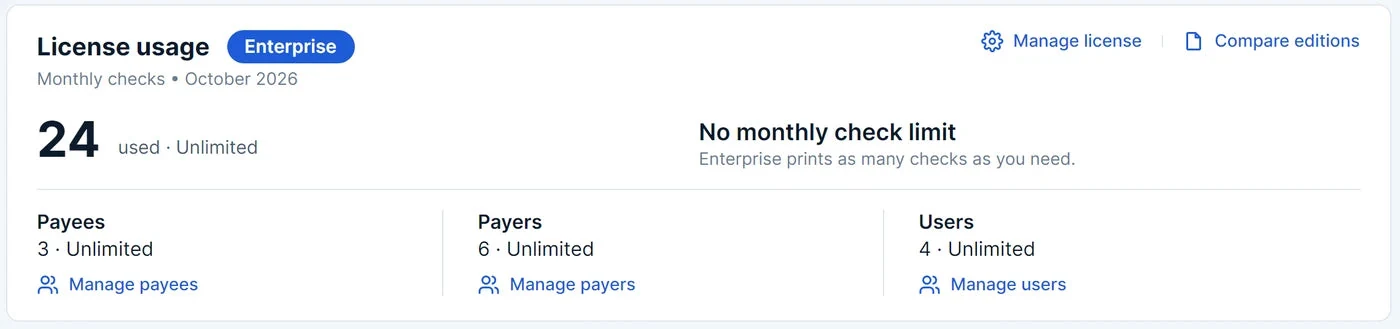
This card shows your edition badge and the checks used this month against your monthly allowance. Below that are payees, payers and users against your edition’s limits. The “License usage” section below explains what you may see.
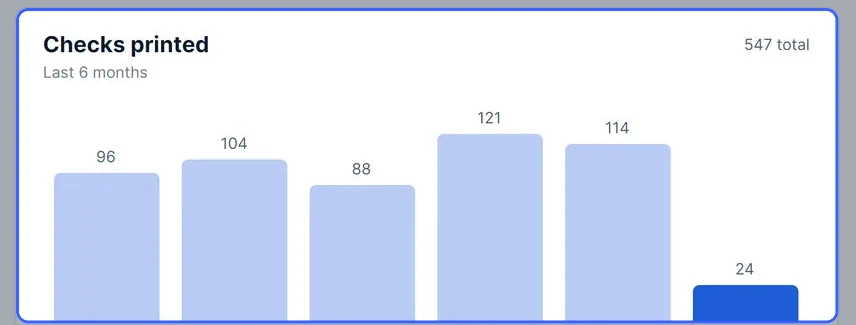
This bar chart covers the last 6 months. The current month is highlighted, and the six-month total is at the top right.
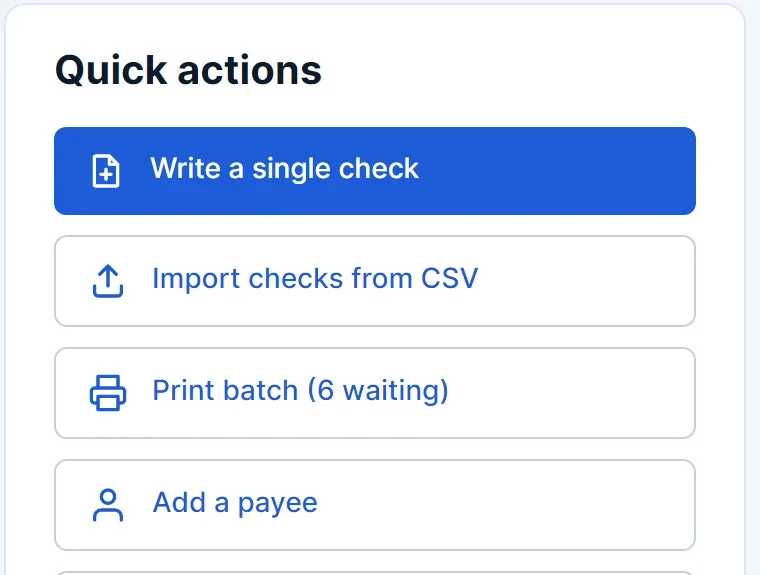
These are one-click shortcuts to your most frequent jobs. The “Quick actions” section below lists when each one appears.
Manage license and Compare editions open Settings → License. Each meter has a link for managing those records.
| You see | What it means |
|---|---|
18 / 25 checks used this month, with a bar |
Standard and Professional have a monthly allowance, and the bar fills as you print. |
| Almost used | You’ve used at least 80% of this month’s checks. |
| Limit reached | This month has no checks left, or payees are at your edition’s limit. A yellow banner names what’s full. |
| Monthly allowance resets … | The allowance restarts on the 1st of next month. |
| used · Unlimited | Enterprise has no monthly check limit. |
| CHAX is in trial mode | No license is active, and checks print with a DEMO watermark. Choose Activate license. |
You only see the actions your edition and user role allow. Trial mode’s edition shows them all.
| Action | Opens | Shown when |
|---|---|---|
| Write a single check | New check | Always |
| Import checks from CSV | Import checks | Enterprise, and your role can import |
| Print batch (n waiting) | The batch | Enterprise, and your role can print batches |
| Add a payee | Payees | Your role can edit payers and payees |
| Monthly transaction report | Reports | Professional or Enterprise, and your role can run reports |
Recent checks, at the bottom of Home, lists your five latest checks with check number, date, payee, payer, amount and status. To see more, choose View all transactions → to open Transactions. The card reads “No checks yet.” until you print or export a check.
Besides the switch, you can pick Light, Dark or Match system in Settings → Appearance.

The allowance counts printed checks dated in the current calendar month, the same way New check and Print review enforce it. So it restarts on the 1st, not 30 days after your first check. Trial mode has no limits.
Standard allows 25 checks a month and one payee. Professional allows 100 a month and two payees. Enterprise has no limits. Every edition has unlimited payers and users. Read Editions.
Home reads its numbers from the database each time you open it, so they include checks printed on other PCs sharing the database in host mode.
CHAX keeps the theme for each Windows user on this PC, so two people on one computer can each have their own.
Move your CHAX 10 checks, payers, payees, users and settings into a new CHAX 11 database, and learn what to verify before you print.
Open migration in one of two ways: choose Migrate existing data on the first page of first-run setup, or go to Settings › Migrate from CHAX 10. The page has three stages: Source, Check and Import.
The CHAX 10 data card shows a green tick, the folder CHAX found, and what it holds. That can include checks, payers, payees, recurring checks, batch and users, bank changes and your printer settings.
If the card says “CHAX 10 wasn’t found on this computer”, choose Choose CHAX.MDB… and select the CHAX.MDB in CHAX 10’s data folder. A copy from a backup or another PC also works.

New CHAX 11 database suggests a file called chax-from-chax10.db, next to your current database. Keep that or choose Browse…. The import always creates a new file and never overwrites an existing one.

Choose Check data. CHAX reads your CHAX 10 data and shows what would move. It writes nothing at this stage.

Review the counts and notes. A red Skipped tag marks a row that can’t be imported and gives the reason. Other notes describe data that was merged or adjusted.
Accept the result, or fix what you need to in CHAX 10 and choose Check data again.

Choose Import into new database. CHAX writes the new database, switches to it and asks everyone to sign in. Use your CHAX 10 user ID and password. Anyone with no password in CHAX 10 picks one at first sign-in. Read Signing in.

| From CHAX 10 | In CHAX 11 |
|---|---|
| Printed checks | Transactions, with print history. A check printed several times keeps one entry per print. |
| Payers and payees | Records › Payers and Payees. Identical duplicates merge, and a row with no name is skipped. |
| Recurring checks and the batch | Recurring checks and the batch |
| Users | Settings › Users, with the same user IDs and passwords |
| Banks you added or changed | Bank routing. A routing number without 9 digits is skipped. |
| Saved CSV mappings | Import checks. A payee phone column is ignored. |
| Printer settings | Printer, tray, check position on the page, checks per page, and Safety or Economy stock |
| Signature choice | Check format: authorization message or signature line |
| Check alignment offsets | Not carried over. Read the next section. |
| License | Not carried over. Activate a CHAX 11 license. |
Since CHAX 11.1.0, an upgrade uses CHAX 11’s own check alignment and leaves CHAX 10’s offsets behind. CHAX 11’s layout already matches today’s check stock at zero offsets, so the old adjustments would push fields out of place.
If your CHAX 10 alignment differed from its defaults, the Check stage tells you:
CHAX 10 still opens exactly as before, because its files are never changed. A failed import leaves nothing behind and doesn’t touch your current CHAX 11 database.
Finding CHAX 10. CHAX checks the data folder named in CHAX 10’s settings first. It then checks the CHAX 10 install folders under Program Files (x86), Program Files and your user’s AppData. It also reads this Windows user’s CHAX 10 printer settings and saved CSV mappings.
Reading the files. A small reader included with CHAX 11 opens CHAX 10’s password-protected Access databases read-only. Nothing is written to them.
Writing the new database. Check data decides what happens to each row: it becomes a CHAX 11 record, merges with an identical one, or gets reported with a reason. The import writes exactly what you checked, into a temporary file that takes its real name only when everything is in. Passwords are hashed on the way in, so plain text never reaches the new database.