Knowledge Base › CHAX 11 › Records
Payees, payers, and the routing directory
Set up who you collect for, who pays you, and the bank routing directory.
Windows and macOS3 guides


Knowledge Base › CHAX 11 › Records
Set up who you collect for, who pays you, and the bank routing directory.
Set the business name that prints on “Pay to the order of”, pick a default payee, and add the other companies you represent.
In CHAX, the payee is your business or a company you represent. Its name prints on the “Pay to the order of” line of every check, and its name and address print again lower down. The payer is your client, whose bank account the check is drawn on. Payers have their own page, covered in Payers: your clients and their bank accounts.
Open Payees under Records in the sidebar. This page is for the Power user and Admin roles. Standard users don’t see it in the sidebar.
Choose Add payee at the top right.

Type the Payee name exactly as it should print on your checks. No other field is required. You can add a Phone number and up to four address lines, such as the street on Address line 1 and the city, state and ZIP on the next line.

As you type, the Payee summary card on the right shows how the name and address will read. Choose Save changes, and a green message confirms the new payee.
CHAX fills in the default payee each time you start a new check. Select a payee in the list and choose Set as default. The Default column moves to that payee, and only one payee can hold it.
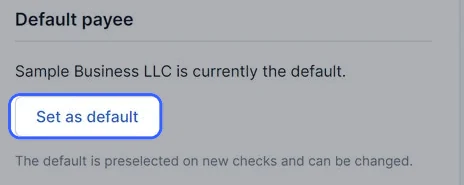
You can also tick Use as my default payee while adding or editing a payee. The card names the Current default, so you know what you’re replacing. The default is only a starting point, and you can pick another payee on New check before you print.
Select the payee and choose Edit payee.
Change the name, phone or address, then choose Save changes. To leave the payee as it was, choose Cancel.

Saved changes apply to future checks only.
With a payee selected, choose New check to this payee to open New check with that payee chosen. Choose View transactions to open Transactions filtered to that payee.
Add each company as its own payee, and make the one you use most the default. To write a check for another company, change Pay to the order of on New check, or start from that payee here with New check to this payee. The search box at the top finds a payee by name, address or phone.
CHAX stores the payee’s name and address with each check when it prints, so a later edit doesn’t change checks already in Transactions. The edit page confirms this: “Saved changes apply to future check entries. Existing transaction records stay unchanged.”
Each payee record has a default flag, and setting a new default clears the old one. New check opens with the flagged payee. With no default set, the page says “No default payee is set.”
A name is the only rule. Saving without one shows “Enter the payee name.” under the field.
CHAX checks the limit against your saved payees when you choose Add payee. Editing and setting a default are never limited.
Save each client’s contact details and the bank account their checks are drawn on, so their next check takes only a few clicks.
A payer is your client, the person or business paying you. CHAX draws each check on the payer’s bank account, with their permission, and makes it payable to your business, the payee. Get your client’s authorization before you draw a check on their account. Read Payment authorization forms and the phone script.
Open Payers under Records in the sidebar. This page is for the Power user and Admin roles. No edition limits the number of payers.
Keep the payer’s check or bank details nearby. You need the 9-digit Routing number and the Account number from the bottom of their check.
Choose Add payer at the top right. Under Contact, type the Payer name, which is required, then the Phone number and up to four address lines. The name, address and phone print in the check’s top left corner.

Under Bank information, type the Account number and the Routing number, then choose Find bank. CHAX looks up the routing number in the bank routing directory. It fills in the Bank name and, when the directory has one, the Transit number. You can also type the bank name yourself.
The transit number is the optional fraction form of the routing number, such as 12-345/678.

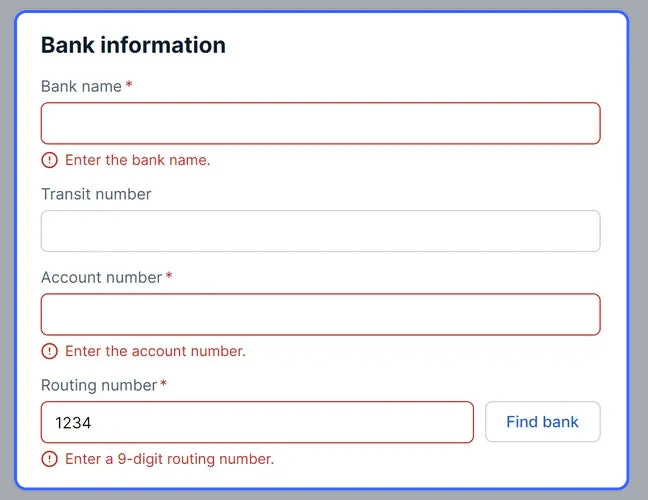
0001234321 stays 0001234321 on the check and in the MICR line.Choose Save changes. CHAX outlines any missing or wrong field in red and gives the reason under it. Nothing saves until you fix every problem.
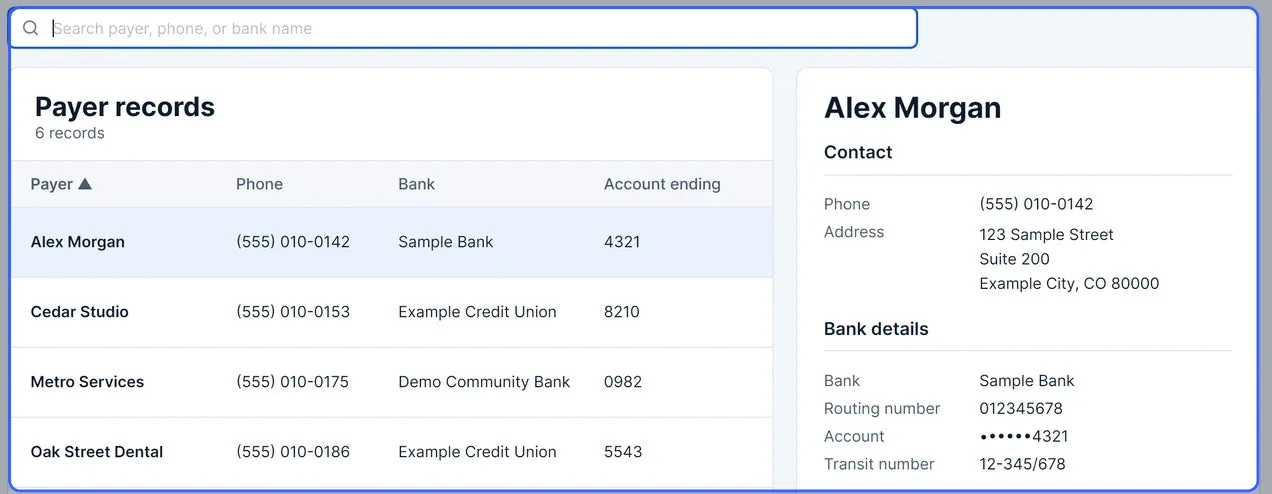
Type in the search box to filter by payer name, phone or bank name. Choose the Payer column heading to sort A to Z or Z to A. Select a row to see the contact details and Bank details on the right. The list and the details show only the last four digits of the account.
With a payer selected, choose New check for payer. New check opens with their details and bank account filled in, and the next check number for that account. Choose Edit payer to change the details, or View transactions to see their past checks.
| Field | Rule | Message |
|---|---|---|
| Payer name | Required | Enter the payer name. |
| Bank name | Required | Enter the bank name. |
| Account number | Required, digits only | Enter the account number. / Use digits only. |
| Routing number | Exactly 9 digits | Enter a 9-digit routing number. |
| Routing number with Find bank | Must be in the routing directory | This routing number isn’t in the bank routing directory. |
New check applies the same rules again before any check prints, with messages such as “Account number: digits only.” and “Enter a 9-digit routing number.”
You can’t change the Account number or Routing number on an existing payer, because they identify the account earlier checks were drawn on. The name, phone, address, bank name and transit number stay editable.
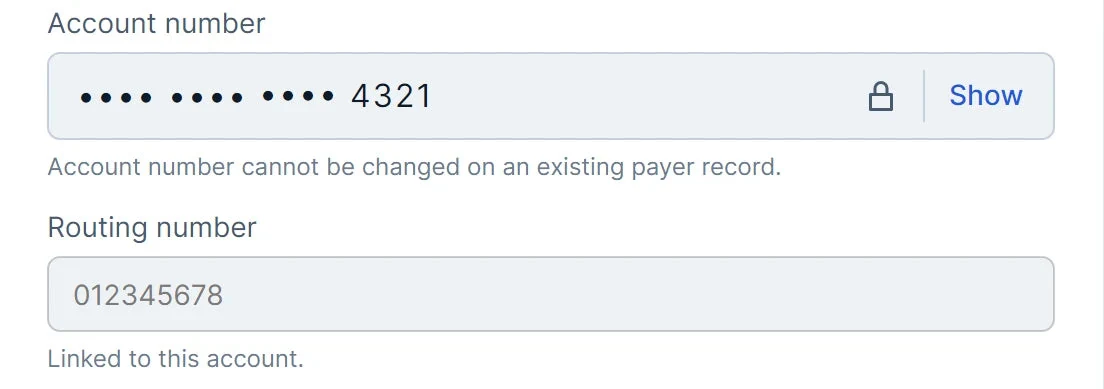
The account number is masked. Show displays it in full, and Hide masks it again.
If your client changes banks or accounts, add the new account as a new payer record.
“Account ending” means the last four characters of the account number. An account number of four digits or fewer shows in full. In the payer list and details, up to six dots replace the digits before the last four, as in ••••••4321.
CHAX stores routing and account numbers as text, so it never drops leading zeros. The MICR line prints the exact digits you typed.
Find bank looks for an exact 9-digit match in the routing directory. It fills in the bank name, plus the transit number when the record has one. Saving a new payer also stores the bank’s address from the directory with the payer.
Each printed check keeps its own copy of the payer’s name, address and bank details, so an edit affects future checks only. The edit page says “Updating this payer does not change previously recorded checks.”
Look up a bank by routing number, name or city, correct or add a bank, and import updates from a CSV file.
CHAX includes a directory of about 29,700 US banks. It supplies the bank name and transit number when you choose Find bank by routing number on New check, or Find bank on a payer. You’ll rarely need to change it.
Open Bank routing under Records in the sidebar. This page is for Power users and Admins, who have the Modify routing permission. Standard users don’t see it in the sidebar.
In the search box, type the start of a routing number, or part of a bank name, branch or city. The table shows 10 banks per page, and the page buttons at the bottom show more.

Select a row. Bank details on the right lists the bank name, routing number, branch, full address, bank type and branch code.
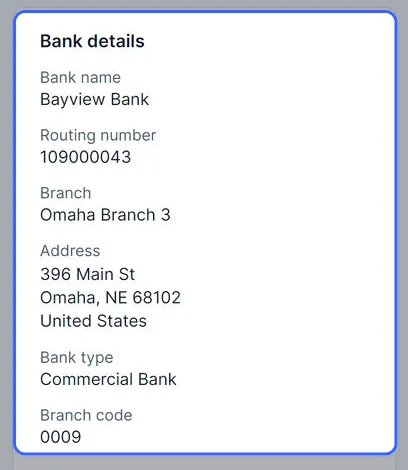
Choose Edit record. You can change the bank name, branch, address, city, state, ZIP code, transit symbol, bank type or branch code. Then choose Save changes.

You can’t change the routing number, because it identifies the record. To use a different number, add a new record.

Choose Add routing. Enter the bank name, the street address, city and state, and the Routing number (9 digits). You can leave Branch, ZIP code, Transit symbol and Branch code empty. Pick a Bank type: Commercial Bank, Credit Union, Savings Bank or Federal Reserve. Then choose Save changes.

Choose Import updates. CHAX Professional and Enterprise include this feature, and Standard shows a message instead.

Under Select file, choose Browse… and pick a CSV file of 10 MB or less. CHAX reads the file and shows what would change. Nothing is saved yet.
Validation summary counts the new records to add, the existing records to update, and the unchanged records.

Preview changes lists every row with its action (Add, Update or Unchanged) and, under Details, what would change.

Choose Import updates (N), where N is the number of records to add or update. To leave the directory as it is, choose Cancel.

A green message then confirms how many records were added and updated.

The first row must be a header row. CHAX finds columns by name, ignoring case, spaces and dashes. The file must include a routing number column and a bank name column, or CHAX says “The file needs a routing number column and a bank name column.”
| Field | Column names CHAX recognizes |
|---|---|
| Routing number | Routing, Routing number, Routing no, ABA, RTN |
| Bank name | Bank, Bank name, Name |
| Branch | Branch, Branch name |
| Street | Address, Street, Address1 |
| City / State / ZIP | City; State, ST; ZIP, ZIP code, Postal code |
| Transit symbol | Transit, Transit symbol |
| Bank type | Type, Bank type |
| Branch code | Branch code, Code |
Rows with a problem, such as a routing number that isn’t 9 digits or a missing bank name, show as errors and are left out. The summary says how many rows can’t be imported, and you can still import the rest.
| Message | What to do |
|---|---|
| Enter the bank name. | Type the bank’s name. |
| Enter a 9-digit routing number. | US routing numbers have exactly 9 digits, with no spaces or dashes. |
| Enter the street, city and state. | Fill in all three address fields. |
| Enter a 5-digit ZIP code. | Use 5 digits, or ZIP+4 such as 68102-1234. You can also leave it empty. |
| (Bank) already uses this routing number. | The directory already has this number. Search for it and edit that record instead. |
CHAX 11 ships with 29,687 banks from the CHAX 10 routing database, and loads them the first time your routing table is empty. From then on the directory is yours, and CHAX keeps the banks you add or change.
The routing number is each record’s key. An import adds a record for a new number and updates the record for an existing one. A row that exactly matches the directory counts as unchanged and isn’t written.
CHAX confirms the number has exactly 9 digits, but doesn’t test its check digit. A mistyped number of the right length can still be saved, so compare it with the payer’s own check.
Payers keep their own copy of the bank name and transit number. Editing a directory record doesn’t change saved payers or printed checks.