Knowledge Base › CHAX 11 › Writing checks
Write and print checks with CHAX 11
Get authorization, write a check, review it, export it, and print batches of checks.
Windows and macOS5 guides


Knowledge Base › CHAX 11 › Writing checks
Get authorization, write a check, review it, export it, and print batches of checks.
Enter your client’s bank details and an amount, review the preview, and print a check your payee can deposit.
In CHAX, the payee is your business, the name on the “Pay to the order of” line. The payer is your client. The check is drawn on your client’s bank account, with their permission.
Open New check in the sidebar. Pay to the order of already shows your default payee. If you represent more than one company, select another from the list or choose Change.
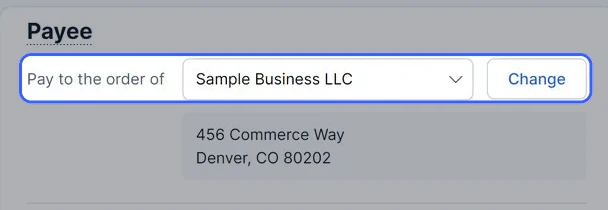
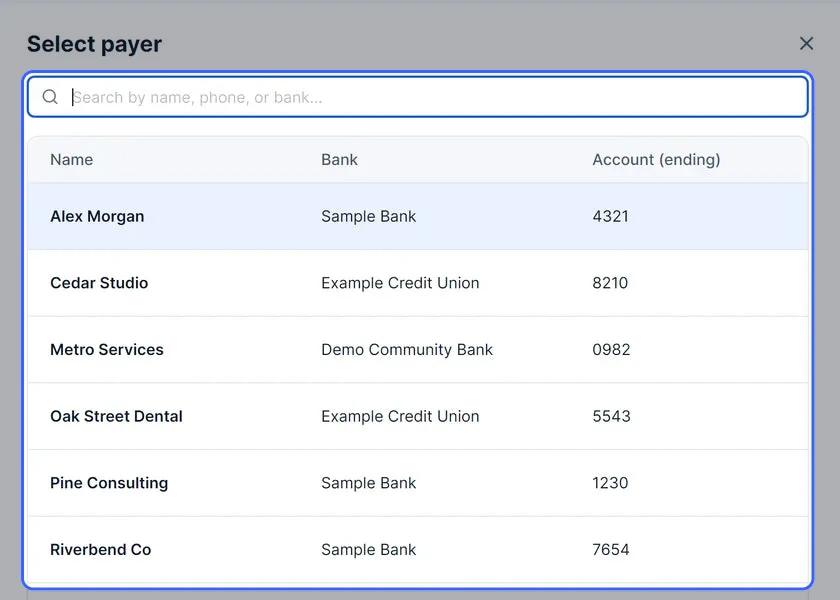
For a saved client, choose Find existing payer and search by name, phone or bank. The list shows only the last four digits of each account. Your selection fills in the name, address, phone and bank details.
For a new client, type the details directly into the form.
From the bottom of your client’s check, type the 9-digit Routing number and the Account number. Choose Find bank by routing number to fill in the bank name and transit number from CHAX’s directory of about 29,700 banks.
The transit number, such as 12-345/678, is the fraction printed near the check number. The directory supplies it, so you’ll rarely need to type it.
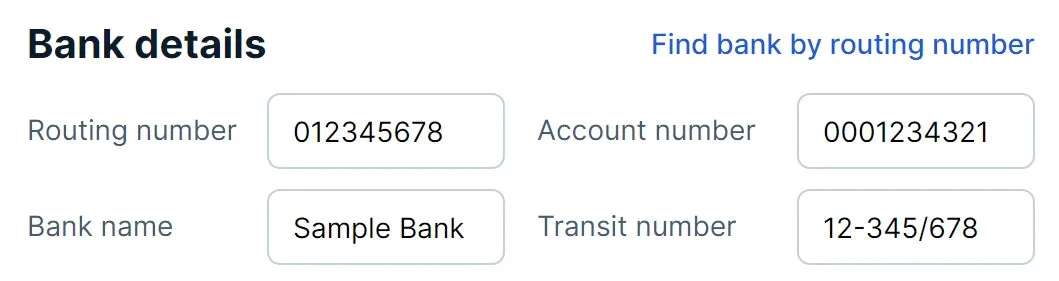
0001234321 stays 0001234321.Type the Amount, such as 245.00, and CHAX writes it out in words on the check. Check number fills in the next unused number for this account. Add the date and a memo, such as an invoice number.

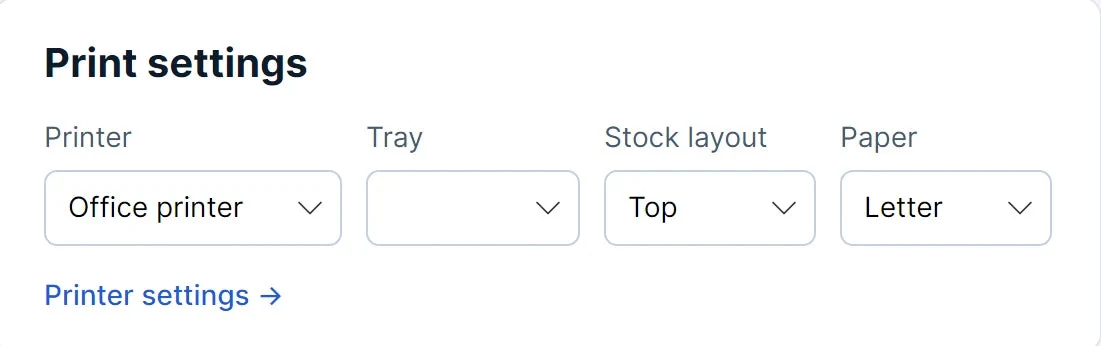
Under Print settings, choose the printer, the tray holding your check stock, the stock layout and the paper size, which is always Letter. These values come from your Printer setup, and changes here apply to this check only.
Stock layout sets where the check sits on the sheet: Top, Middle or Bottom. Match it to your check paper.
Choose Review & print. The review panel shows the full-size check and a one-line summary. Confirm that the summary reads correctly, and verify the payee, amount and MICR line.

Choose Print check. You can also choose Export PDF… to save a copy, or Back to edit to make changes.

When you choose Review & print, CHAX validates the form and puts every problem in one banner, since some fields may be scrolled out of view.

| Message | What to do |
|---|---|
| Amount is missing | Enter an amount above zero, such as 245.00. |
| Your license prints checks up to … | The amount exceeds your edition’s check limit. Split the payment or upgrade your edition. |
| Enter a 9-digit routing number | US routing numbers always have 9 digits. Look for a missing or extra digit. |
| Check number: digits only | Remove any letters, spaces or dashes from the check number. |
| Check 1050 was already used on account ending 4321 | Use the next number. The next section explains duplicates. |
Bank sorting machines read the numbers along the bottom of the check, which print in the E-13B MICR font. CHAX builds the line from three fields, in this order: check number (1050 in this example), routing or transit number (012345678), and account or on-us number (0001234321).

The ⑆ symbols mark the routing number. The ⑈ symbols mark the account and check number. Print on a laser printer at 100% scale. Many banks also ask for MICR toner.
When you pick a payer or bank, CHAX finds every check on that routing and account number, both printed checks in Transactions and those waiting in the batch. It adds one to the highest number. A new account starts at 1001.
A duplicate means the same check number on the same routing and account number. The same number on a different account is fine. CHAX blocks duplicates before printing, so the bank never sees two checks with one number.
A check reaches Transactions only after it’s sent to the printer. If printing fails, your entry stays on screen and nothing is recorded. Each printed check keeps its output history: who printed it, on which computer, and when.
See what each part of a CHAX check is, where its value comes from, and how CHAX builds the MICR line along the bottom.
Each check CHAX prints is drawn on your client’s account (the payer) and made payable to your business (the payee). Enter the values on New check, and CHAX places them on the check and shows a live preview as you type. The word “SAMPLE” in Review check appears on screen only and doesn’t print.
What prints depends on your check stock. Choose your stock in Printer and check stock.

| Part | Where it is | Where the value comes from |
|---|---|---|
| Payer name, address and phone | Top left | The payer on New check. The name is bold, followed by up to four address lines and the phone. |
| Bank name and transit number | Top center | Bank name and Transit number, the fraction form of the routing number, such as 12-345/678. |
| Check number | Top right, after “CHECK NO.” | Check number. CHAX suggests the next unused number for the account. |
| Date | Under the check number | Date, printed as MM/DD/YYYY. |
| “Printed with CHAX Software” | Small grey text in the top right corner | Always on Standard and trial checks. Professional and Enterprise can turn it off in Check format. |
| Pay to the order of | The long line under the header | The payee you choose, which is your business. |
| Amount | Right of the payee, after “$” | Amount, with commas and two decimals, such as 1,245.00. |
| Amount in words | The line under the payee, ending in “DOLLARS” | CHAX writes it from the amount. |
| Payee name and address | Below the amount in words | The payee’s saved name and address. |
| Memo | Bottom left, after “MEMO” | Memo, such as an invoice number. |
| Signature area | Bottom right | A line captioned “AUTHORIZED SIGNATURE”, or the authorization message described below. |
| MICR line | Along the bottom edge | Check number, routing number and account number, described below. |

CHAX rounds the amount to the cent, then writes the dollars in words and the cents as a fraction. So 245.00 becomes “Two hundred forty-five and 00/100”. Asterisks fill the rest of the line, so nothing can be added after it.
A check normally has a signature line captioned “AUTHORIZED SIGNATURE”. Check format lets you print the authorization message instead. It reads “THIS PAYMENT HAS BEEN AUTHORIZED BY YOUR DEPOSITOR”, then “Any questions? Call” with the payer’s phone, “Signed:” with the payer’s name, and “by authorized representative”.
Use the message for checks drawn with the payer’s permission that have no handwritten signature. Keep the payer’s authorization on file.
Licensed checks carry a very small code directly under the bank’s transit number. It identifies the license that printed the check, the print date and the check number. If someone changes the amount, payee or bank numbers, the code no longer matches. Chax Software can decode it on request. Read Check fraud trace.
The numbers along the bottom use the E-13B MICR font, which bank sorting machines read. In this example they read check number 1050, routing or transit number 012345678, and account or on-us number 0001234321.

CHAX prints the fields in this order.
| Field | Symbols | Notes |
|---|---|---|
| Check number | On-us symbol ⑈ before and after | Matches the number in the top right corner. |
| EPC digit (optional) | None | Off by default. Some banks expect this single digit before the routing number. Turn it on in Check format only if your bank asks. |
| Routing number | Transit symbol ⑆ before and after | The 9-digit ABA number of the payer’s bank. |
| Account number | On-us symbol ⑈ after | Exactly as typed, including leading zeros. |
CHAX lays out the 8.5 by 3.5 inch check in hundredths of an inch, using the positions from CHAX 10’s check reports. Text uses Verdana and Arial, which come with Windows and macOS, and the MICR line uses the E-13B font included with CHAX. The screen preview comes from the same layout as the printed page.
The MICR line prints in the clear band, the bottom 5/8 inch of the check, and must sit at least 3/16 inch above the bottom edge. The alignment test page outlines this band so you can measure it against your stock.
The line holds only digits, plus dashes as the MICR dash. Before printing, CHAX refuses letters in the check, routing and account numbers.
With 1 check per page, the sheet also has a file copy headed “FILE COPY OF CHECK”, and a confirmation stub marked “CONFIRMATION – NOT NEGOTIABLE”. The stub lists who the check is drawn to, the payer’s account, and the date, check number and amount. Their order follows the check position (top, middle or bottom). With 3 checks per page, used for batch printing, each sheet has checks only.
With no license, checks print with a large “DEMO / TRIAL” watermark and “D E M O” across the check. The MICR line uses the placeholder numbers 012345678 and 123-456-789 instead of real bank numbers. Banks won’t accept these checks, and they have no fraud trace.
Check a finished check at full size, print it or save it as a PDF, and see what CHAX records when you do.
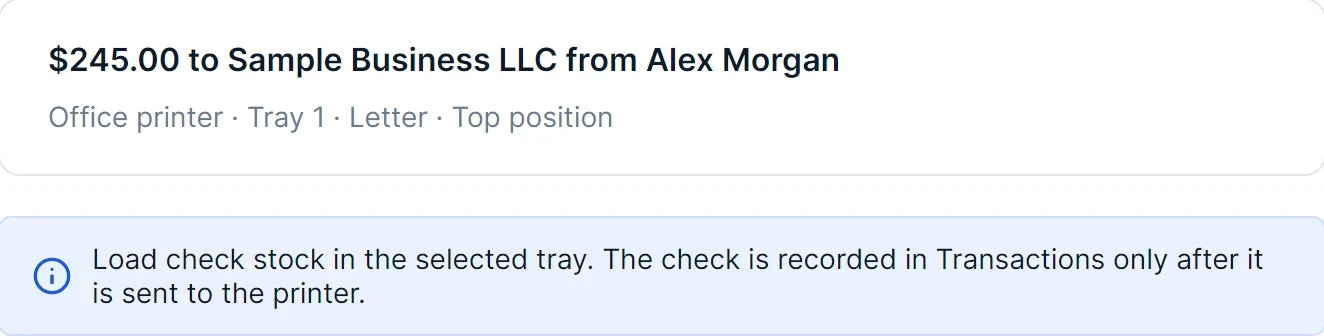
Fill in the check on New check first, following Write and print a check. Load your check stock in the tray you chose under Print settings.
Choose Review & print at the top of New check. CHAX checks the form first. If anything is missing or wrong, a red “Fix before printing” banner lists every problem, and the panel stays closed. CHAX also stops a check number already used on the same account, and a check that would exceed your edition’s monthly check limit.
With everything in order, the Review check panel opens with the check at full width.

One line under the preview sums up the check, such as “$245.00 to Sample Business LLC from Alex Morgan”. The line below shows where it will print: printer, tray, paper and position. If the printer or position is wrong, go back and change it under Print settings.
Choose Back to edit, or the close button at the top right of the panel. Your entry stays as it was.

Choose Export PDF…, then pick a folder and a name. For check 1050, CHAX suggests check-1050.pdf. CHAX saves the check instead of printing it, and records it the same way as a printed check. Use this to print later from another computer, or to keep a digital copy.

Choose Print check. CHAX sends the check to the printer and closes the panel.

A green message confirms it, such as “Check 1050 for $245.00 sent to Office printer.” The form keeps the payer and moves to the next check number, ready for the next check.

Standard prints up to 25 checks a month and Professional up to 100. Enterprise has no monthly limit. Export PDF counts the same as printing. Once the month’s checks are used up, Review & print shows a message instead of the panel. Trial mode has no monthly limit, but its checks print as DEMO checks. Read Editions compared.
The preview, printed page and PDF share one page layout, so what you review is what prints. The PDF is a US Letter page with no margins and every element at its exact position. Print it at 100% scale (“Actual size”), never “Fit to page”, or the MICR line will move.
A single check always prints 1 per page. The sheet holds the check, a file copy and a confirmation stub, in an order that follows your chosen position (top, middle or bottom). The word “SAMPLE” over the preview appears on screen only.
CHAX records the check only after the print job reaches the printer or the PDF is written. The record stores a full copy of the check (payer, payee, bank details, amount, number, date and memo), the user who printed it, and the time. Later edits to the payer or payee never change it.
Review & print compares the check number with every check on the same routing and account number, both in Transactions and waiting in the batch. The database also refuses a second check with the same number on the same account, even if a screen were to miss it.
To print or export the same check later, open it in Transactions. Each reprint or export adds a line to its output history. Professional and Enterprise include reprinting. Read Transactions.
Create a form to sign, or a script to read on a recorded call, so you have permission on file before you create a check.
CHAX prints each check without the payer’s handwritten signature, so you need their permission first, and a record you can show if a check is ever disputed. CHAX 11 gives you two ways to get it.
A one-page PDF that your client signs and returns. Use it for one check or for recurring checks.
A PDF that you read word for word on a recorded call, ticking a box after each “yes”. It covers one check only.
Start on New check, and choose the payee first, because the authorization names who the check is payable to. Filling in the payer and amount saves typing, but you can leave them blank.
Choose Authorization… at the top of New check. The Payment authorization panel fills in from the check. Change the Payer name if needed, or leave a field blank for the payer to complete by hand.
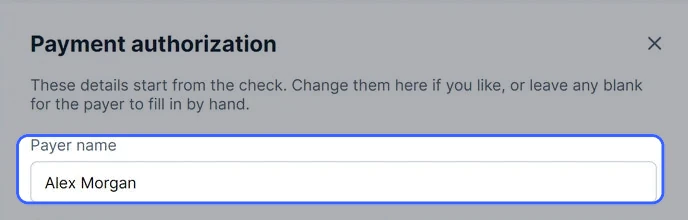
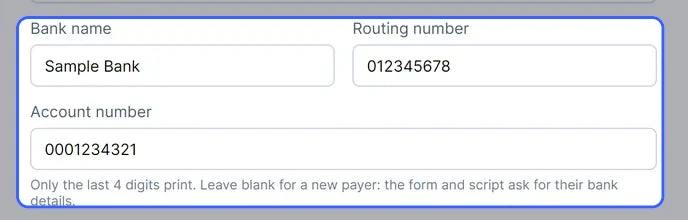
Check the bank name, routing number, and account number. Only the last four digits of an account you already have will print.
For a new client, leave the account number blank. The form then asks them to write in their bank details or tape on a voided check, and the script asks them to read the numbers to you.
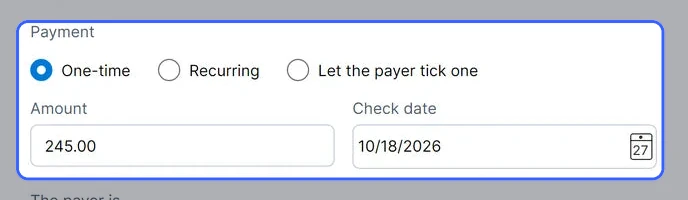
One-time covers one check, with an amount and date. Recurring sets a schedule, first check date, and amount. Let the payer tick one leaves both boxes blank for the payer to complete.

With Full amount of each invoice ticked, the form says you’ll send each invoice before the check date.
A person’s form reads “I, (name), authorize…”, and a business’s reads “We, (company), authorize…”, signed by a representative. CHAX picks business when a name ends in LLC, Inc, Corp, or similar, so check its choice.


A business form adds lines for the signer’s title, email, and phone.
For a one-time payment, choose Phone script PDF…, and save the file. The button is greyed out for recurring payments, because those need a signature on the form.
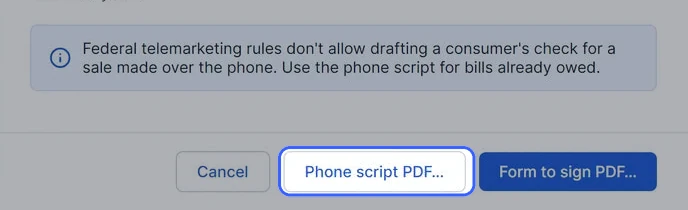
The reminder appears when the payer is a person. The script explains it in more detail.
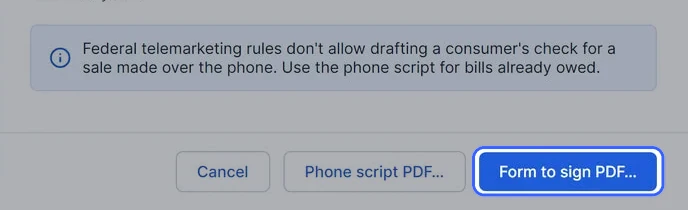
Choose Form to sign PDF…, and save the file. Open it, print it, and send it to your client.
Read each step exactly as written, and tick its box only after a clear “yes”. If an answer is no or unclear, stop, and don’t create the check. The script covers these points in order:
Afterward, complete the record of the call at the bottom of the sheet: who took it, the date and time, the name given, the number called, the recording reference, and the written confirmation you sent.
Keep the signed form, or the recording, for at least five years. You can also keep the script sheet with a copy of the written confirmation you sent before the check was deposited. If a payer disputes a check, these records are your evidence.
Queue checks in the batch, pick which to print, confirm the printer and layout in Print review, and print them in one job, one or three to a page.
CHAX Enterprise includes batch printing. Other editions show “Batch printing is part of CHAX Enterprise” on the batch page, and Add to batch on New check shows a message instead. In trial mode, with no license, batch printing works but checks print as DEMO checks.
Batches are for Power users and Admins. Checks reach the batch in three ways, and nothing prints until you choose to print it.
On Home, choose Print batch, which shows how many are waiting, or Print batch now → on the Waiting in batch tile. After an import, the batch opens by itself.

The bar at the top shows how many checks are in the batch, how many are selected, and the selected total. Tick the checks to print. Newly imported or prepared checks start ticked. The box in the table heading ticks every check on the page, and Deselect clears them all. You can search by payer, payee or check number.
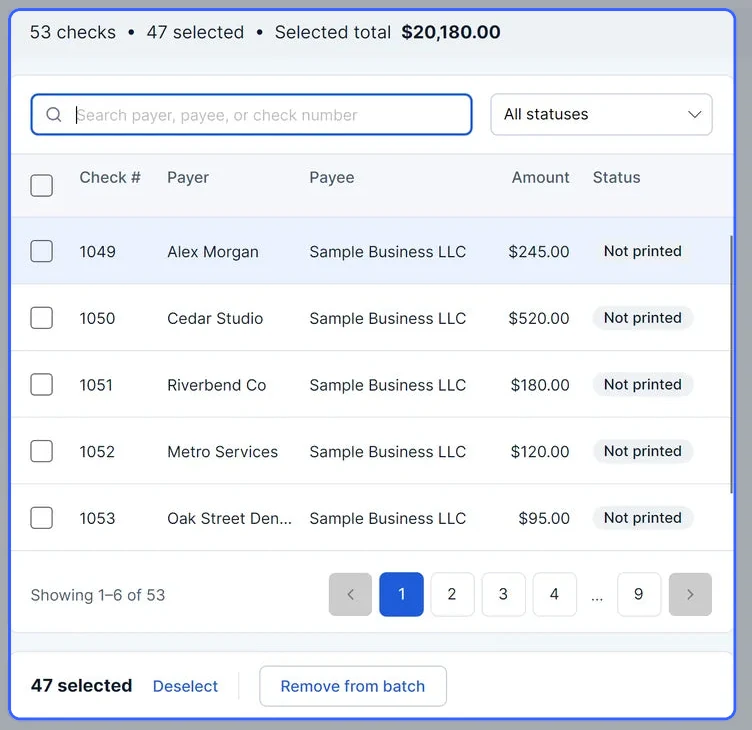
Select a row to see it on the right. The preview shows the highlighted row exactly as it will print.

Choose Edit details to change the Amount, Check number, Check date or Memo, then choose Save changes. The change applies to this check in the batch only, and the imported file stays as it was.

To take checks out, tick them and choose Remove from batch. Removed checks don’t print.

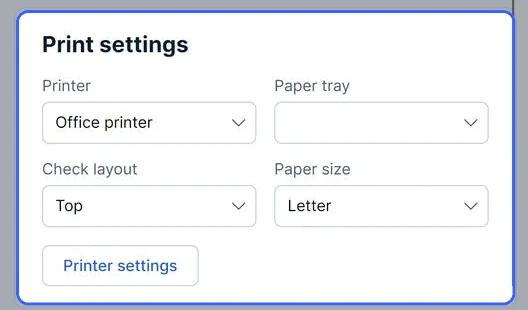
Under Print settings, choose the Printer, Paper tray, Check layout (Top, Middle or Bottom) and Paper size. Letter is the only size checks print on. These become your saved printer settings when you continue.
Choose Review & print N checks at the top right. The button counts the checks you ticked.

Under Layout, choose 1 check per page or 3 checks per page. Load matching check stock in the tray named in the blue reminder.
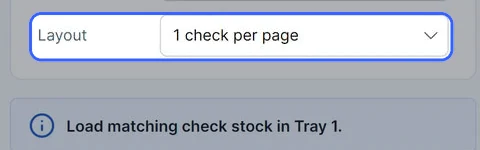
The Page preview updates to match. The arrows step through the pages, and − and + zoom.

Choose Print N checks. CHAX sends all the checks as one print job. When it finishes, you’re back in the batch with a green message, and the printed checks have left it.


You can instead choose Export PDF… to save all the checks as one PDF. CHAX suggests a name such as batch-2026-10-27.pdf, and the checks move to Transactions, as when printed. To change your selection, choose Back to batch.

| Layout | What each sheet holds | Use it with |
|---|---|---|
| 1 check per page | The check, a file copy and a confirmation stub, arranged by the position you chose (Top, Middle or Bottom). | Stock with one check per sheet. |
| 3 checks per page | Three checks stacked in the top, middle and bottom positions, with no copies or stubs. | Three-to-a-page check stock. |
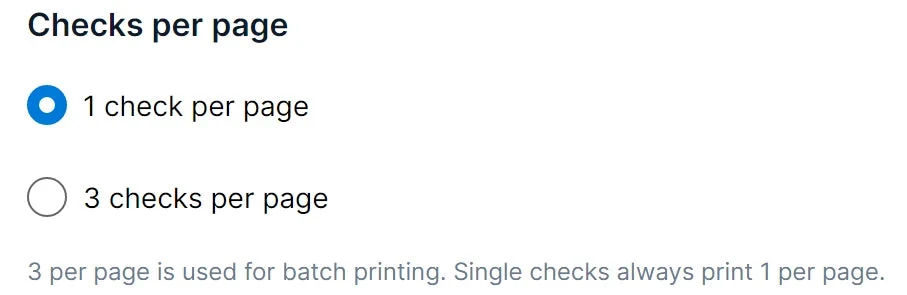
Print review starts with the Checks per page choice from Settings › Printer setup. Single checks from New check always print 1 per page. Outside Enterprise, the 3 per page option is greyed out in Printer setup.
Your database stores batch checks with the status Not printed, and they aren’t in Transactions yet. CHAX still counts them when it picks the next check number and looks for duplicates, so a number waiting in the batch can’t be used twice.
Only after the print job reaches the printer, or the PDF is written, does CHAX record each check in Transactions and remove it from the batch. Each output history says “Sent to (printer) (batch)” or “Exported to PDF (file, batch)”, with the fraud trace code on licensed checks.
A page has three 3.5-inch slots. With 3 per page, checks fill the slots in order, so the last sheet may have one or two checks. With 1 per page, the check takes the slot for its position, and the file copy and stub take the other two.
CHAX saves the printer, tray, paper and position from the batch page, and the layout you print with in Print review, as your printer settings.