Knowledge Base › MultiCHAX 11 › Printer and check setup
Set up your printer and check stock
Choose your printer and stock, line up every field on the check, and set the secure font, sign-in, and appearance.
Windows4 guides


Knowledge Base › MultiCHAX 11 › Printer and check setup
Choose your printer and stock, line up every field on the check, and set the secure font, sign-in, and appearance.
Tell MultiCHAX which MICR printer this PC uses and which trays hold check stock and plain paper, then print a test page.
Install the MICR printer in Windows first. Printing checks takes blank check stock and a laser printer with MICR toner, which lets banks’ machines read the MICR line. Pages are always US Letter (8.5 × 11 inches) at 100%. To order stock and toner, see Buying and ordering checks.
Go to Settings › Printer and stock. Under MICR printer, pick the printer that has MICR toner and prints your checks.

Checks print from Tray with check stock. Reports and copies print from Tray with plain paper. With Automatically select, the printer decides.

The line below the cards tells you where your default template puts the check, for example “QuickBooks Online prints the check at the top of the page.” Check position and stubs belong to each check template. Change them in the template designer.

Load one sheet of check stock and choose Print test page. You get a test check in your default template. If it doesn’t match the stock, choose Check alignment.

Choose Save. MultiCHAX confirms with “Saved. Checks print on … from this PC.”

| Message | What to do |
|---|---|
| There are no printers on this PC. Install the MICR printer in Windows first. | Add the printer in Windows Settings and reopen this page. |
| … was the MICR printer, but it isn’t installed on this PC any more. | Pick the printer to use and save. |
| There are no check templates yet, so there’s no test check to print. | Add a template in Check templates. |
The printer and trays belong to this Windows user on this PC, and they’re stored in %AppData%\CHAX\MultiChaxUserSetting.db. The previous version of MultiCHAX reads the same settings, so both versions print the same way on one PC. Repeat this setup on every PC that prints checks.
Checks set to print on arrival always use the printer and tray saved here. See Set up your accounting program.
Move what MultiCHAX prints to fit your check stock on this PC’s printer, for both the whole page and the MICR line inside the clear band.
Choose the MICR printer in Printer and stock. Keep a few sheets of check stock and a ruler close by. Offsets are in hundredths of an inch, so 100 means one inch and 1.50 means one and a half hundredths.
Go to Settings › Check alignment. The Test check on the right uses your default template and first bank account. It’s marked VOID, and the check and its clear band are outlined. Load a sheet and choose Print test page. You can also choose Save test check as PDF… and print that PDF at 100% (actual size).
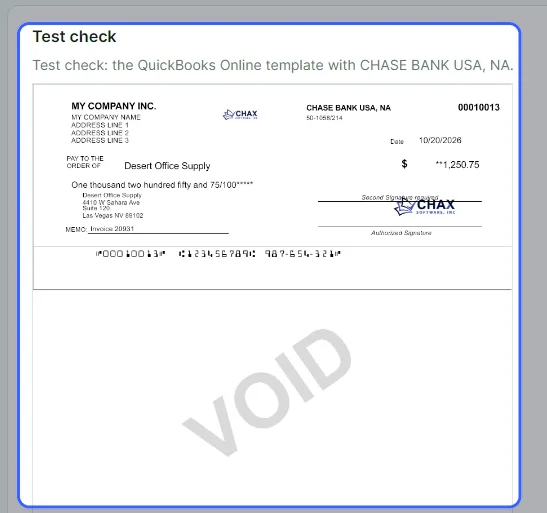
Put the test page over a blank check and hold both up to the light. If all the fields are off by the same amount, change Page offset: Right (+) or left (−) and Down (+) or up (−). For example, entering 5 for down moves everything 5 hundredths of an inch lower.

The MICR line has to sit inside the clear band at the bottom of the check. Change MICR line position: From the left edge and From the top of the clear band. The standard position is 30.65 across and 18.75 down.

The test check redraws as you type. Print another test page. When it lines up, choose Save. To go back to 0, 0 and the standard MICR position, choose Reset offsets.

| Message | What to do |
|---|---|
| Each offset is a number of hundredths of an inch, such as 1.50 or -2. | Type a number. Add a minus sign to move left or up. |
| Choose the MICR printer in Settings → Printer and stock to print a test page. | Choose the printer first, or save the test check as a PDF. |
The page offset moves everything printed on the page. The MICR line position sets where the MICR line starts inside the clear band, measured from the check’s left edge and the top of the band. The clear band starts 2.875 inches down the check.
Both settings are saved for this Windows user on this PC, and the previous version of MultiCHAX shares them. All checks printed on this PC use them: Incoming checks, Write check, Blank checks, Import from PDF, and reprints. In Incoming checks, you can change them for a single print without saving.
Print the amount in a font that’s hard to alter by hand, and choose whether MultiCHAX asks for a user name and password at startup, on every PC using the database.
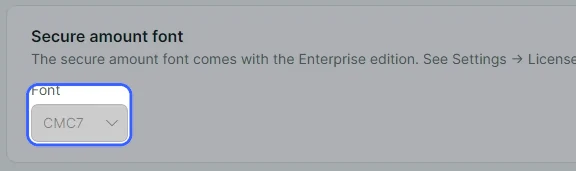
This font makes the payee and amount harder to alter by hand. It comes with the Enterprise edition and requires an active license. In the trial and other editions, the switch stays off. See Editions compared.
Go to Settings › Secure font and sign-in and turn on Secure amount font.

Pick one under Font. The list has the secure fonts that were installed with MultiCHAX.
With sign-in off, everyone works as the built-in administrator with every permission. With it on, each person signs in and sees only the screens, bank accounts and check amounts their permissions allow.
A new database comes with one administrator account and a starting password. Contact support for the starting sign-in details. Until you change that password, this page warns you to do so before people start signing in. Choose Open Users & permissions, change it, and add a user for each person. See Users and permissions.

Turn on Sign-in and choose Save. MultiCHAX confirms with “Saved. MultiCHAX asks for a user name and password when it starts, on every PC.”
After that, the sidebar names the person signed in and has a Sign out link. See Signing in.
Both settings live in the MultiCHAX database, so they reach every PC using it. The previous version of MultiCHAX stores the same settings in the same place.
With the setting on and an active Enterprise license, the payee and amount use the secure font in Incoming checks, Import from PDF, Write check and reprints. The font files are in the Fonts folder next to MultiCHAX.
Choose light or dark pages for MultiCHAX on this PC, and the screen it shows after you sign in.
Go to Settings › Appearance. Under Light or dark, pick Same as Windows, Light or Dark. Same as Windows follows any change you make in Windows. The screen updates right away, so you can see the result.

Under Startup screen, set Open MultiCHAX on to Incoming checks, Home, Write check or Transactions. Incoming checks is the default.
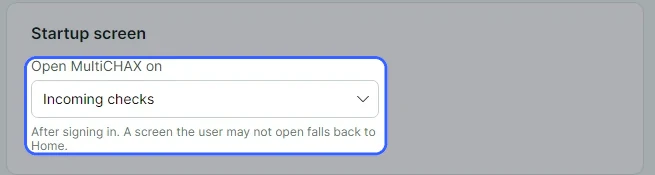
Choose Save. You’ll see a confirmation such as “Saved. MultiCHAX opens on Home from now on.”

Both choices belong to this Windows user on this PC, so PCs can differ. The theme has no effect on printed checks, PDFs or reports.
If an administrator signs in to a database that has no bank account, Add bank account opens in place of the startup screen.
Talk to the support team, or browse all MultiCHAX 11 help.
Contact Support All MultiCHAX 11 Help