Knowledge Base › MultiCHAX 11 › Records
Bank accounts, templates, and payees
Set up the bank accounts, check templates, payees, payers, and routing directory that every check draws on.
Windows5 guides

Knowledge Base › MultiCHAX 11 › Records
Set up the bank accounts, check templates, payees, payers, and routing directory that every check draws on.
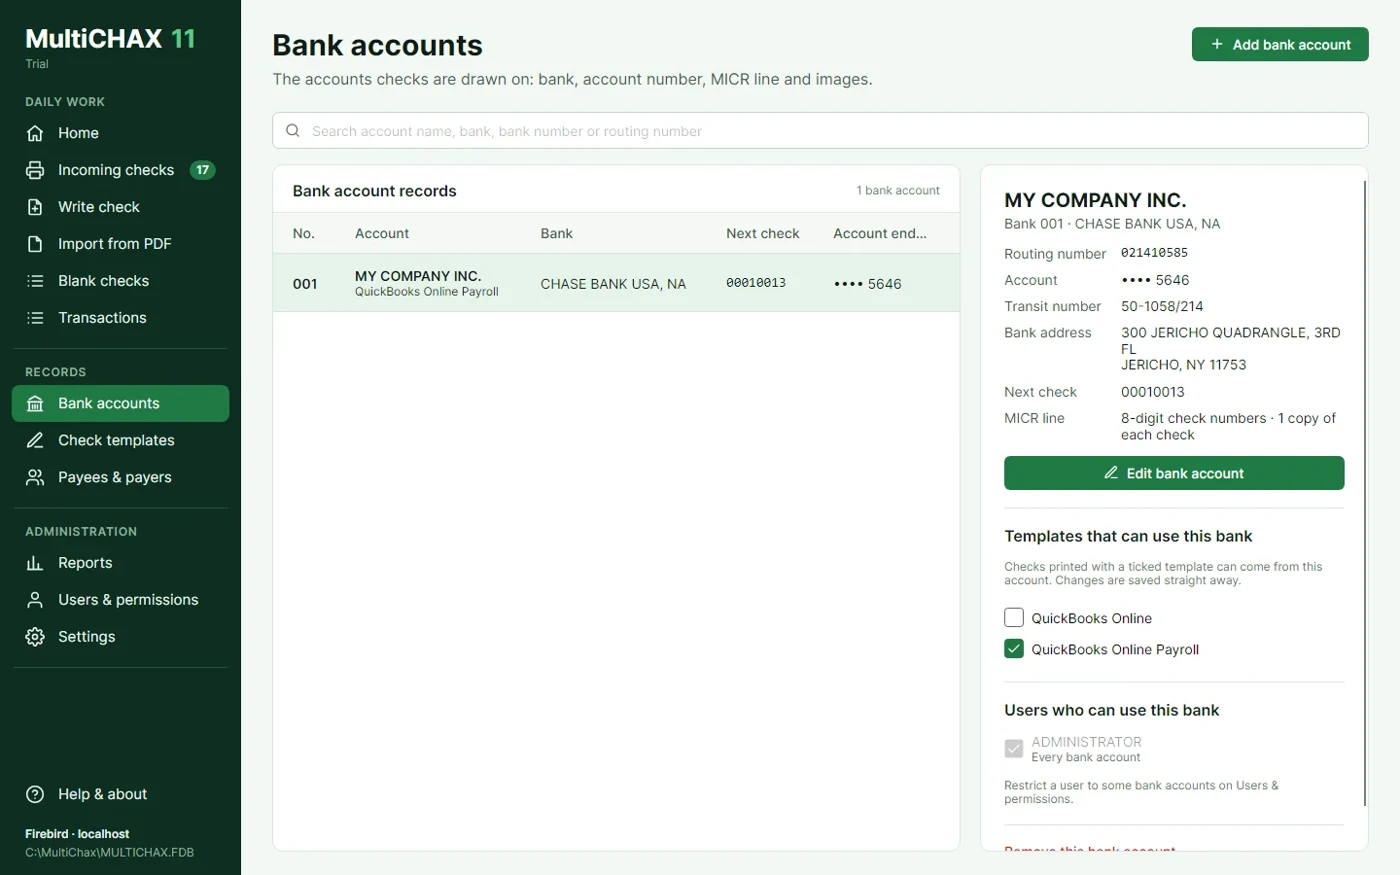
Add each account your checks are drawn on, with its MICR numbers, holder, signature lines and images, then choose the templates and users that can use it.
MultiCHAX draws each check on a bank account. The holder’s name and address print at the top left, and the routing number, account number and check number print in the MICR line. Keep a check or statement from the account close by.
Bank accounts opens for administrators only. Other users see “Administrators only” and a request to have an administrator add or change bank accounts.
Choose Add bank account, then type the 9-digit Routing number from the bottom of a check. MultiCHAX looks it up in the bank routing directory. If the directory’s details differ from the form, choose Use these details to fill in the bank name, address and transit number. The form stays as it is until you choose that. To search the directory by bank name, routing number or city, use Find bank… instead.
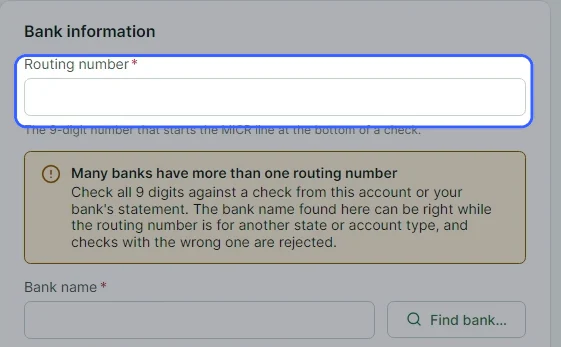
Complete these fields under Account:
| Field | What to enter |
|---|---|
| Bank number | A number from 1 to 999 that no other account uses. With automatic numbering, the first digits of a check number use this number to pick the account. |
| Account holder | The payer’s name, printed at the top left of the check. The address goes in Account holder’s address. |
| Account number | 4 to 17 characters, as the number prints in the MICR line. |
| Next check number | The number for the next check from this account. |
| Copies of each check | Enter 1 for one check, or a higher number for extra copies. |
| Check number in the MICR line | 6 digits or 8 digits, to suit your check stock and bank. |
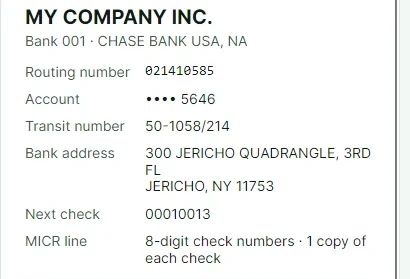
After you save, the chosen account’s details show these values.
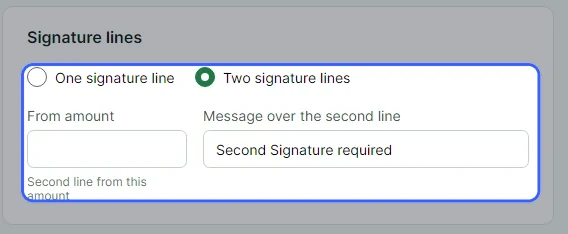
Under Signature lines, pick One signature line. If checks from a certain amount need a second signature, pick Two signature lines. Then enter the From amount and a Message over the second line, such as “Two signatures required”.
Under Images, you can add three pictures: a Logo, a Signature scanned on a white or clear background, and an Overlay, which is a full-page background such as a watermark. PNG, JPEG, BMP and GIF files work.

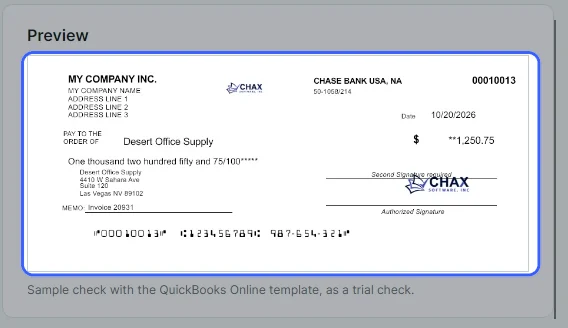
The Preview redraws a sample check with your default template as you type. When it looks right, choose Save changes.
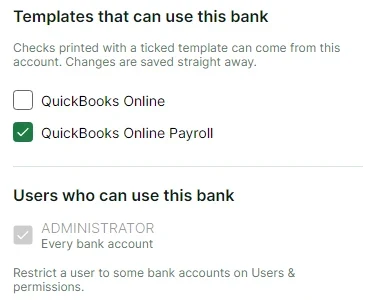
Back on the list, pick the account. Under Templates that can use this bank, tick each template whose checks can come from it. MultiCHAX saves each tick at once. A user restricted to some bank accounts can be ticked here too. You restrict a user on Users & permissions.
Pick the account and choose Edit bank account, or double-click it. Checks you’ve already printed don’t change.
An account number locks once checks have printed on it. For a new account number, add a new bank account. To remove an account, choose Remove this bank account…. MultiCHAX takes it off all templates and users, and its printed checks stay in Transactions. You can’t remove your only bank account.
| Message | What to do |
|---|---|
| Bank number 002 is already used by another account. | Pick a bank number that no other account has. |
| This number’s check digit doesn’t match. | This is only a warning, but a digit may be wrong. Compare the routing number with a printed check before you save. |
| The check number has more than 6 digits. | Choose 8 digits under Check number in the MICR line, or use a lower number. |
| Your edition allows 5 bank accounts. | Remove an account, or move up an edition. Compare them in Editions compared and see pricing. |
A check at or above the From amount gets a second signature line above the template’s signature line, with your message centered over it. This line prints even when the template has its own signature line turned off.
The other eight digits of a routing number determine its last digit, the check digit. A mismatch usually means a typing mistake. MultiCHAX warns you but still lets you save.
MultiCHAX hides a removed account and doesn’t delete it, so Transactions keeps all checks printed from it. Its template links, user permissions and default-bank settings are deleted.
Use a ready-made template for QuickBooks Online or Xero, or make your own that says where each value sits in your print file or PDF and where it prints.
Check templates opens for administrators only. An administrator also sets each user’s default template, which is where Incoming checks starts, in Users & permissions.
A template can’t print without a bank account, so add a bank account first.
| Column | What it means |
|---|---|
| Template | The template’s name. Yours marks your default. |
| Source | The accounting program: QuickBooks Desktop, QuickBooks Online, Quicken, Other or Not set. |
| Numbering | Automatic, Manual or Semi-automatic. Read Print checks from your accounting program. |
| Bank accounts | The accounts this template can print from. You tick them on Bank accounts. |
| Default for | The users who have this as their default template. |
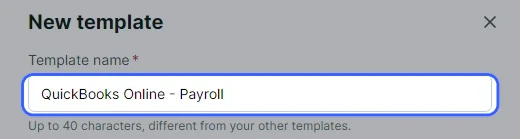
Choose New template. In Template name, type a name of up to 40 characters that none of your other templates uses.
| Start from | When to use it |
|---|---|
| A ready-made template | For checks read with Import from PDF. Pick QuickBooks Online, QuickBooks Online – Payroll or Xero. It’s ready to print. |
| The standard layout | The MultiCHAX sample check layout, which you set up for your own accounting program in the designer. |
| A template from your library | A layout you kept with Save to library in the designer. |

Under Use the same bank accounts as, you can pick a template. The new template then copies its bank accounts and each user’s default bank. Or leave the choice as None. Tick them on Bank accounts.

Choose Make template. A ready-made template joins the list, ready to use. One made from the standard layout or the library opens in the template designer so you can place its fields.
| Template | Numbering | Notes |
|---|---|---|
| QuickBooks Online | Automatic | The bank account is picked by the check number on each check. |
| QuickBooks Online – Payroll | Manual | Payroll checks carry no check number, so you pick the bank account and starting number. It begins with the bank accounts of the QuickBooks Online template. |
| Xero | Manual | PDF checks from Xero carry no check number either. |
All three put the check at the top of the page. A new database comes with as many of them as your edition allows, in the order above.

Source positions locate each value in the print file, in printer pixels at 300 per inch. Output positions place it on the check, in hundredths of an inch from the top-left corner of the check, in the same way as the previous version. Templates from the previous version work unchanged.
A check prints only from a bank account linked to its template. When an administrator links a template to an account and has no default bank for that template, that account becomes their default.
The limit applies to both New template and Duplicate. The previous version of MultiCHAX didn’t apply it to Duplicate.
Place each field on the check, set fonts, captions, layout and numbering, and read a sample print file so the template can find your accounting program’s values.
Go to Check templates, pick a template and choose Open in the designer. This is for administrators only. Your edits aren’t saved until you choose Save template, and an Unsaved changes pill appears while you have some.
On the Output tab, choose where the check sits under Check on the page: top, middle, bottom or three checks per page. Choose the Stubs, then how Check numbers work:
| Check numbers | What happens |
|---|---|
| Automatic: the check number picks the bank account | MultiCHAX keeps the number from the print file. Its first digits, as many as Bank number digits says, give the bank account’s number. |
| Manual: choose the bank account and starting number | You pick both in Incoming checks. |
| Semi-automatic: type the starting number | You type the starting number, and its first digits pick the bank account. |
Set the Accounting program as well. Print stubs as a table of the bills paid applies only to QuickBooks Online checks.
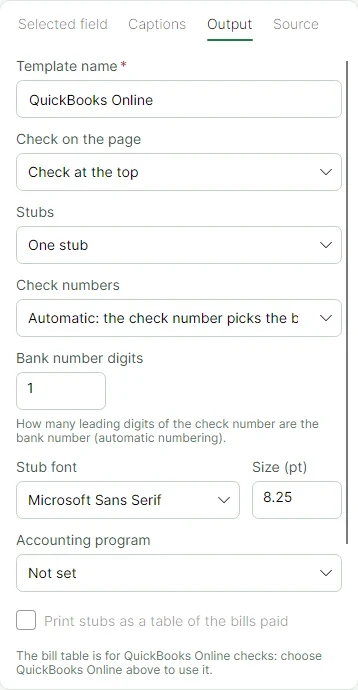
On the Source tab, choose Read sample print file… and pick a .txt or .grp file from your accounting program. The canvas changes to Sample print file and shows the page as your program printed it.

Click some text on the sample page, then choose Use selected text beside the value it belongs to, such as Amount. The line under the value changes to Reads: and the text it found. Repeat for the date, check number, payee, amount, written amount, address lines, memo, and the stub’s top and bottom lines. To use the bank account’s next number, leave Check number at 0,0.

Go back to Check layout. Drag a field to move it. Or pick it under Check fields and use the arrow keys, with Shift to move 10. The Selected field tab lets you type its X (across) and Y (down), and set its font, size, bold, italic and underline. To resize the logo or signature, drag a corner.

On the Captions tab, untick any captions and lines already printed on your check stock, such as “Pay to the order of” or the signature line.

Pick a bank account under Preview with, then choose Print preview to see the page at 100% with this PC’s offsets. When it’s right, choose Save template.

Both library buttons are on the Output tab. Save to library… keeps a copy of the layout for starting new templates, and the copy includes unsaved changes. Load from library… replaces all positions, fonts and settings in the designer with a saved layout. The template’s name stays the same, and you need to save to keep the change.
| Message | What to do |
|---|---|
| There’s already a template called … | Enter a different name on the Output tab. Case doesn’t count when names are compared. |
| The font … has a name too long for MultiCHAX’s database | Pick a font with a shorter name, such as Arial. |
| This file has no printed text in it. | Pick a print file made by your accounting program. It can’t be empty or contain only images. |
X and Y on the check are in hundredths of an inch from its top-left corner: 0 to 850 across and 0 to 287 down. Fields stay above the MICR clear band, which holds the routing, account and check numbers. Positions on the Source tab are in printer pixels, at 300 per inch.
MultiCHAX reads each value from the text at its Source position. For the amount, it reads everything to the right of its column on that line. Stub text runs from the stub’s top line to its bottom line.
Snap to grid moves fields in steps of 5. The arrow keys ignore the grid and move 1 at a time, or 10 with Shift.
Save who your checks are made out to, pick the default payee for new checks, and see the payers checks were written from.
The payee is the person or company the check is made out to, named after “Pay to the order of”. The payer is who the check comes from: the bank account’s holder, printed at the top left of the check.
Make sure Payees is chosen, then choose Add payee.

Fill in the Name, Phone and up to four Address lines. On the check shows how they’ll print after Pay to the order of.
Tick Make this the default payee to have it filled in on each new check. You can still change it on the check before printing.

The chosen payee’s details show which payee is the default.
Choose Save payee. Changes apply to new checks. Checks already written stay the same in Transactions.
You don’t need to add all your payees here. When you type a new payee on Write check, MultiCHAX adds it when the check goes out.
Choose Payers to see the list, with each payer’s bank and account ending. Each time a check is written, MultiCHAX saves the payer with the bank account it was written from. To add a payer yourself, choose Add payer.

Payer names are saved in capitals, as MultiCHAX always has. This bank account is picked with the payer on Write check.
| Message | What to do |
|---|---|
| There’s already a payee called … | Use that payee, or change the name. |
| … is the default payee. Make another payee the default before removing it. | Make a different payee the default first. |
| Saved with … which isn’t one of your bank accounts | The payer has a bank account you may not use. MultiCHAX keeps it unless you pick another. |
All users can open Payees & payers, not only administrators. When you add a payer, you’re offered the bank accounts the signed-in user may use.
Once a default payee is chosen, there’s always one. A new database starts with a payee called STARTER as the default. Rename it, or make a different payee the default.
Search the built-in directory of about 29,700 routing numbers that fills in bank details for your accounts, add a missing bank, or import updates.
Go to Settings › Bank routing. Settings is for administrators. Most of the time you use the directory without opening it, when you type a routing number in Add bank account or choose Find bank… there.
In the search box, type part of the bank’s name, the first digits of the routing number, or the city. Each page lists 12 banks. Choose a bank to see its routing number, branch, address, transit symbol, bank type, branch code and file date.

Choose Add routing. You must fill in the bank name and routing number.

Fill in the Bank name, Branch, Address and City, state and ZIP code as they print under the bank’s name, such as BELLA VISTA, AR 72714. Add the 9-digit Routing number. If you have it, also add the Transit symbol, the fraction printed on the check, such as 81-701/829.
Choose Save changes. To change a bank later, pick it and choose Edit routing record, or double-click it. Delete record… takes it out of the directory, and bank accounts that use it keep their details.

To bring in many changes at once, choose Import updates. You see what will change before anything is imported.
Pick a CSV with a header row, the Federal Reserve’s FedACH directory (.txt), or another RTN.MDB. A CSV can have these columns: Routing number, Bank name, Branch, Address, City, State, ZIP (or City/State/ZIP), Transit symbol, Bank type, Branch code. MultiCHAX keeps any details a file leaves out. If a file has a routing number twice, the last line wins.

This shows how many records are new, will update or are unchanged, along with any lines left out.

Preview changes marks each bank Add, Update or Unchanged, and says what changed.

Choose Import updates to apply the changes. The directory stays the same until you do.
| Message | What to do |
|---|---|
| Routing number … is already in the directory. | Search for that number and edit its record. |
| This number’s check digit doesn’t match. | This is only a warning. Compare the routing number with a printed check. |
| The file needs a header row with a Routing number column. | Add a header row to the CSV that names its columns. |
The directory is a file on each PC, %LocalAppData%\MultiCHAX11\RoutingDirectory.db. It’s separate from the MultiCHAX database. It started from RTN.MDB in the previous version.
Add bank account looks up the routing number and offers the directory’s details with Use these details. It won’t change a bank account on its own, and edits to the directory don’t reach saved bank accounts.
Talk to the support team, or browse all MultiCHAX 11 help.
Contact Support All MultiCHAX 11 Help