Knowledge Base › MultiCHAX 11 › Getting started
Get started with MultiCHAX 11
Install MultiCHAX 11, run first-run setup, sign in, find your way around Home, and upgrade from a previous version of MultiCHAX.
Windows6 guides


Knowledge Base › MultiCHAX 11 › Getting started
Install MultiCHAX 11, run first-run setup, sign in, find your way around Home, and upgrade from a previous version of MultiCHAX.
See what MultiCHAX 11 does, the four ways checks reach it, what payee and payer mean, and what to set up first.
MultiCHAX 11 uses a laser printer to print checks on blank check stock. It handles as many bank accounts as your edition allows. Each check carries the account’s name and address, a check number, and the MICR line along the bottom, so you don’t need pre-printed checks for each account.
There are four ways to get checks into MultiCHAX:
| Page | Where the checks come from |
|---|---|
| Incoming checks | Your accounting program, such as QuickBooks or Quicken, prints to the MultiCHAX virtual printer. Read Print checks from your accounting program. |
| Import from PDF | Your accounting program saved the checks as PDFs. Examples are QuickBooks Online, QuickBooks Online payroll and Xero checks. Read Import checks from a PDF. |
| Write check | You fill in one check on screen. Read Write and print a check. |
| Blank checks | You print the bank details, number and MICR line, then fill in the rest by hand. Read Print blank checks. |
Transactions records each check MultiCHAX prints. Use it to find a check, print it again, or export the list.
In MultiCHAX, the payee receives the money. That’s the name after “Pay to the order of”. The payer is the holder of the bank account, whose name prints at the top left of the check. You keep both on Payees & payers.
When MultiCHAX first starts on a PC, it asks which database to use. All the PCs in an office share one. Read First-run setup.
If the database has no bank account, you land on Add bank account after you sign in. Read Bank accounts.

Pick the MICR printer and trays, then print a test page. Read Printer and stock and Check alignment.

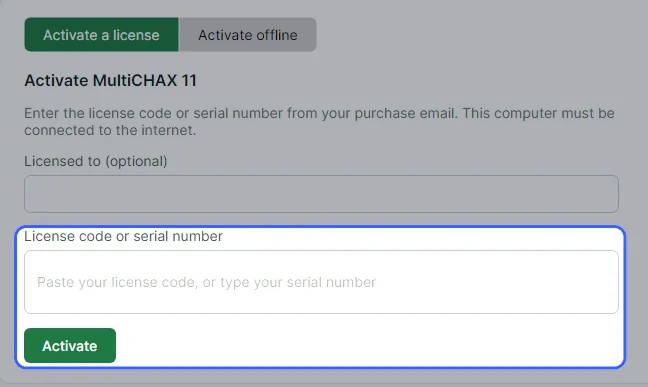
Checks print as demo checks until you activate. Read Activating your license.

| Group | Pages |
|---|---|
| Daily work | Home, Incoming checks, Write check, Import from PDF, Blank checks, Transactions |
| Records | Bank accounts, Check templates, Payees & payers |
| Administration | Reports, Users & permissions, Settings |
At the bottom you’ll find Help & about, with the connected database under it. Only administrators get Bank accounts, Check templates and Settings. Write check and Blank checks each need their own permission. If you can’t see a page, read Users and permissions.
Bank accounts, templates, users and printed checks all live in a Firebird database that the office’s PCs share. The previous version of MultiCHAX uses the same database, so you can move an office over one PC at a time. Read Upgrading from a previous version of MultiCHAX.
Each Windows user on each PC has their own MICR printer, trays, offsets, print folder, theme and start page. That lets two PCs use different printers.
Find out what each PC needs before MultiCHAX 11 can print checks, then set up the server PC, the other PCs, and the printers.
| Part | Where | Why |
|---|---|---|
| Windows 10 or 11 | Every PC | MultiCHAX 11 is a Windows program. |
| Firebird 5 database server | The server PC only | It keeps the single MultiCHAX database that all your PCs share. The other PCs reach it over the network. |
| MultiCHAX virtual printer | Every PC that prints from an accounting program | Your accounting program sends checks to this printer, and they show up in Incoming checks. |
| A laser printer with MICR toner | Every PC that prints checks | It prints the MICR line that banks read. Checks print at 100% on Letter paper. |
| Internet connection | Every PC, to activate | Activation checks your license with the CHAX license server. You can activate offline instead. |
Pick the PC that stays on during office hours, and install Firebird 5 and MultiCHAX on it. The database is a file on this PC. Its default location is C:\MultiChax\MULTICHAX.FDB.

On the server PC, MultiCHAX later lists this server and file in Settings › Database & backup.
Install MultiCHAX on each remaining PC. Add the MultiCHAX virtual printer on any PC that prints from an accounting program. These PCs don’t need a database of their own.
The first time it starts, MultiCHAX shows Welcome to MultiCHAX 11 and asks where the database is. Enter localhost as the server on the server PC. On every other PC, enter the server PC’s name. Read First-run setup for the details.
Go to Settings › Accounting software and look at Virtual printer. It should read Installed. If it reads Not installed, use MultiCHAX setup to install the MultiCHAX printer. Read Set up your accounting program for more.

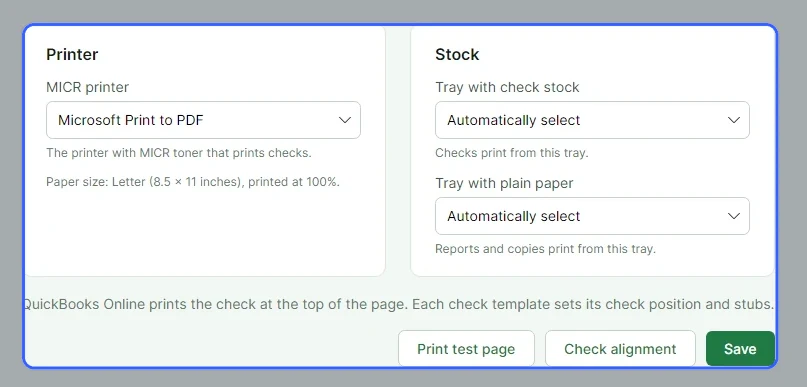
In Settings › Printer and stock, select the MICR printer and the tray that holds your check stock. Then print a test page. Read Printer and stock for more.
The MultiCHAX logo stays on screen while the program works through these stages:
| What you see | What it does |
|---|---|
| Opening the MultiCHAX database… | Connects to the database named in MultiChax.xml. You get the first-run setup screen if that database can’t be reached or none is set yet. |
| Upgrading the database… | Adds the newer MultiCHAX 11 tables to an older database. The previous version of MultiCHAX can still use that database. |
| Checking the license… | Reads the license for this PC. If the PC is moving up from a previous version of MultiCHAX, it activates the license the previous version registered, and you don’t type it in again. |
With sign-in turned on, MultiCHAX next asks for a user name and password. With sign-in off, it opens under the administrator user.
MultiChax.xml, in the same folder as the program.%LocalAppData%\CHAX\multichax11-license.json.%AppData%\CHAX\MultiChaxUserSetting.db, which the previous version also uses.You can run the trial on one PC and Standard on 2. Professional and Enterprise have no PC limit. Compare them in Editions compared.
Connect MultiCHAX to your office database or create a new one, then add a bank account and get ready to print.
All the PCs in your office share one MultiCHAX database. The Firebird server on one of them, the server PC, keeps it. Find out which PC that is and where the database file sits on it. The usual location is C:\MultiChax\MULTICHAX.FDB.
You see Welcome to MultiCHAX 11 whenever MultiCHAX can’t open a database. Fill in two boxes:
localhost on the server PC. On any other PC, type the server PC’s name, such as OFFICE-PC, or OFFICE-PC/3051 for a different port.Choose Test connection. A working connection shows Connected. Firebird …. For a database from an older MultiCHAX, the message also says MultiCHAX will upgrade it on opening.
| If you see | What to do |
|---|---|
| There’s no MultiCHAX database at … | Check the path. If you want to start fresh, choose Create a new database here. |
| The Firebird server on … didn’t accept the MULTICHAX user | Go to the next step and set up the MULTICHAX user. |
| MultiCHAX can’t reach a Firebird server on … | Make sure the server PC is on and Firebird is running. Then read Fix database connection problems. |
MultiCHAX signs in to Firebird as the MULTICHAX user. If a server doesn’t have that user yet, open Set up the MULTICHAX user on this Firebird server. This opens by itself when the server refused the connection. Enter the server’s SYSDBA password and choose Set up the MULTICHAX user. MultiCHAX doesn’t save the SYSDBA password.
Choose Use this database. MultiCHAX saves the location, then restarts and opens it.
If the database has no bank account, an administrator lands on Add bank account. Type the 9-digit Routing number and compare it with a check from that account. Complete the bank and account details, then choose Save changes. Read Bank accounts for more.


Work through this list in order:
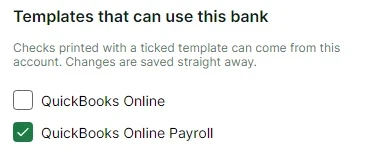
The first item on the list: tick the templates that can use the bank account.
An administrator can switch databases at any time from Settings › Database & backup › Change database…, which opens the same form. Read Your database and backups for more.
Use this database writes MultiChax.xml in the program’s folder. The file holds the server, the database file, and an encrypted password. MultiCHAX reads it at every start.
Given the SYSDBA password, MultiCHAX creates or resets the MULTICHAX user on the Firebird server and lets it create databases. The user gets the standard MultiCHAX password, and all your PCs sign in with it.
MultiCHAX 11 works with database version 5. It upgrades an older database on opening, and the previous version of MultiCHAX can still use that database. It leaves a newer database as it is.
Turn sign-in on or off, sign in and out, change your password, and recover from a forgotten one.
Sign-in is one setting for the whole office. With sign-in on, all PCs ask for a user name and password each time MultiCHAX starts. Each person then sees only the screens, bank accounts and check amounts their permissions allow. With sign-in off, everyone uses MultiCHAX as the administrator user.
Sign-in is off in a new database.
A new database’s administrator user has a starting password. Contact support if you need the starting sign-in details. To replace the password, go to Users & permissions and use Change your password, or edit the user. Read Users and permissions.

Set up a separate user name, password and permissions for each person. Transactions can then show who printed each check.

Go to Settings › Secure font and sign-in. Switch Sign-in on, then choose Save. MultiCHAX confirms with “Saved. MultiCHAX asks for a user name and password when it starts, on every PC.” Read Secure font and sign-in.

Enter your User name and Password, then choose Sign in or press Enter. Case doesn’t matter in user names, because MultiCHAX saves them in capitals. You then land on the start page set in Appearance. If you don’t have permission for that page, you land on Home.
The bottom of the sidebar shows Signed in as and your name. Choose Sign out there to return to the sign-in screen, for example before someone else uses the PC.
| Message | What to do |
|---|---|
| Enter your user name. | The user name box is empty. Type your user name. |
| The user name or password isn’t right. Check them and try again. | Check Caps Lock. Make sure you’re using your MultiCHAX user name and not your Windows one. |
All users can change their own password. In Users & permissions, find Change your password. Enter your Current password and enter the New password twice, then choose Change password. The new password applies at your next sign-in.
An administrator resets it. In Users & permissions, pick the user and choose Edit user and permissions…, then type a new Password twice. The user signs in with that password and can then change it.

The shared database holds the on or off setting, so it applies on all PCs. The previous version of MultiCHAX reads the same setting.
MultiCHAX compares user names in capitals. Deleted users can’t sign in.
Read this month’s check totals, what’s waiting to print, your license, this PC’s printer and your latest checks, and use the shortcuts next to them.

| Tile | What it shows |
|---|---|
| Checks this month | The number of checks printed so far this month, measured against last month, such as “▲ 38% vs September”. |
| Amount printed | The total for this month, and the number of bank accounts those checks came from. |
| Waiting to print | The number of print jobs in the print folder. Choose Open Incoming checks → to print them. |
| License | Your edition. Standard has a monthly limit, so this tile shows the checks left, a bar, and “… of 300 checks used this month”. In trial mode it reads “Checks print as demo checks”. |
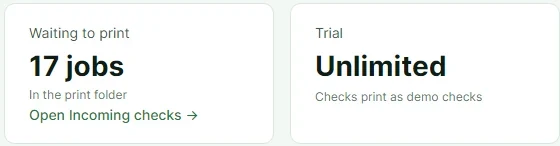
Waiting to print counts the jobs in this PC’s print folder. A PC with no print folder shows No print folder on this computer.
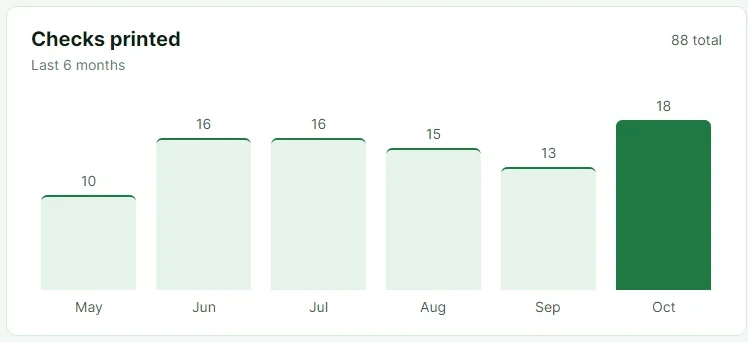
You see one bar per month for the last 6 months, the current month highlighted, and the 6-month total.
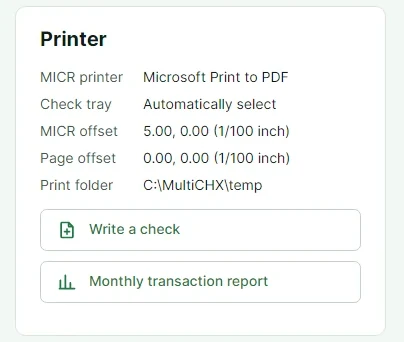
This card lists the MICR printer, Check tray, MICR offset, Page offset and Print folder for this PC. You set them in Printer and stock, Check alignment and Accounting software.
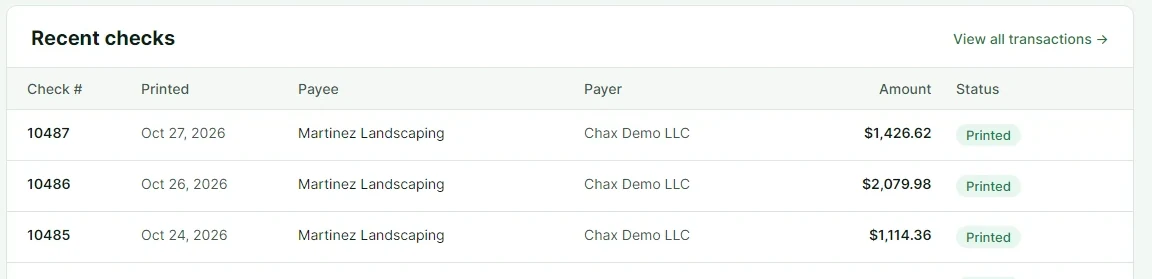
The list holds the 6 most recent checks, with number, date, payee, payer, amount and status. View all transactions → takes you to Transactions. If there are no checks yet, it tells you to start with Incoming checks or Write check.
The Incoming checks button at the top right takes you to Incoming checks.

The bottom of the sidebar names the database server and file in use. When sign-in is on, it also shows who is signed in.

Check counts and amounts come from Transactions, based on the date each check was printed. Waiting to print counts the .grp files in this PC’s print folder. The greeting changes at noon and at 6 pm.
Move your office to MultiCHAX 11 one PC at a time on your existing database, and bring in banks from an older MultiCHAX.
You have nothing to convert. MultiCHAX 11 opens the Firebird database the previous version uses, and the previous version of MultiCHAX can go on using it at the same time.
| What | How it carries over |
|---|---|
| Bank accounts, check templates, payees, payers, users, printed checks | They’re in the shared database, so they’re already there. |
| MICR printer, trays, offsets, print folder | MultiCHAX 11 reads them from the per-PC settings file the previous version uses. |
| Your license | The first time MultiCHAX 11 starts, it activates the license the previous version registered. You don’t type it in again. |
| Virtual printer | It’s the same MultiCHAX printer. Checks you print to it show up in Incoming checks. |
Do this before MultiCHAX 11 starts for the first time. As soon as MultiCHAX 11 opens an older database, it adds its newer tables. This happens before you reach Settings, and no backup is made first. Close MultiCHAX on every PC, then copy the database file somewhere safe. The file is usually C:\MultiChax\MULTICHAX.FDB on the server PC. After this, use the backups built into MultiCHAX 11. Read Your database and backups.
Give it the same server and file the previous version uses, so both versions share one database. Read First-run setup for how.
Settings › Database & backup shows the server and file in use.
Go to Settings › License. License status should read Active. If it reads Trial mode, enter your license code or serial number. Read Activating your license for how.

From Incoming checks, print a sample job with VOID. Compare the result with a check the previous version printed.

Take as long as you need. The previous version of MultiCHAX and MultiCHAX 11 can run side by side on different PCs and share the same database.
Older versions of MultiCHAX kept banks in an Access file called BANKV6.MDB. An administrator can import them. MultiCHAX imports nothing until you choose Import, and it doesn’t change the old file.
Go to Settings › Migration and choose Choose BANKV6.MDB….
Status shows Import, Over limit, or Left out. Details gives the reason, such as “Bank number 001 is taken, so it becomes 003.”
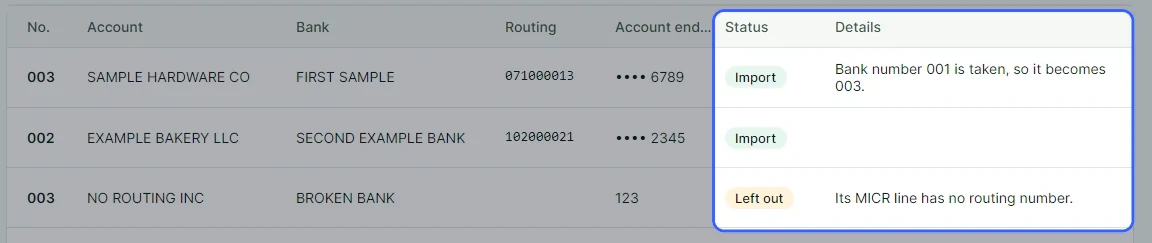
If these banks should print with your default template, tick Use them with my default template.
Choose Import 2 bank accounts. The number on the button matches the banks being imported.

MultiCHAX 11 works with database version 5 and gets there with the upgrade scripts from the previous version. Version 5 adds tables that the previous version doesn’t use, so the previous version of MultiCHAX keeps working. If a database is newer than your MultiCHAX, it stays as it is.
Both versions share one per-PC settings file: %AppData%\CHAX\MultiChaxUserSetting.db. MultiCHAX 11 also keeps its own extras in it, such as automatic printing and the theme.
Talk to the support team, or browse all MultiCHAX 11 help.
Contact Support All MultiCHAX 11 Help