Knowledge Base › MultiCHAX 11 › Printing checks
Print checks with MultiCHAX 11
Print from your accounting program, a PDF, or by hand, print blank checks, and save checks as PDFs.
Windows6 guides

Knowledge Base › MultiCHAX 11 › Printing checks
Print from your accounting program, a PDF, or by hand, print blank checks, and save checks as PDFs.
Send checks from QuickBooks, Quicken, or another program to MultiCHAX 11, review them, and print on blank stock.
How you start depends on your accounting program. Either way, a check template tells MultiCHAX where to read each value, and where to print it.
| Your program | What you do | Where you print |
|---|---|---|
| QuickBooks Desktop, Quicken, and programs that print to a printer | Print to the MultiCHAX virtual printer, which saves each job in your print folder | Incoming checks |
| QuickBooks Online, Xero, and programs that save a PDF | Save your checks as a PDF | Import from PDF |
This guide covers the first route. Before you begin, you need at least one bank account and a check template that fits your program. New databases include templates for QuickBooks Online, QuickBooks Online payroll, and Xero.
You usually only do this once on each PC. An administrator opens Settings, then Accounting software.
The Folder is where the virtual printer saves print jobs, and it’s C:\multichx\temp unless someone changed it. Use Browse… to pick another location. The previous version of MultiCHAX shares this setting, so both versions watch the same folder.
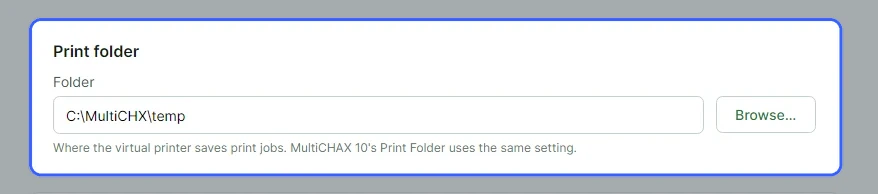
Leave Print checks as soon as they arrive off if you want to look over each job first. Turn it on to send each job straight to your MICR printer with your default template.

The Virtual printer section should say Installed. If it says Not installed, add the MultiCHAX printer by running MultiCHAX setup.

Choose Save settings. MultiCHAX creates the folder if it doesn’t exist yet. These settings apply to this Windows user on this PC, so repeat them on each PC that prints checks.

In QuickBooks, Quicken, or another program, print checks as you normally would, and choose the MultiCHAX printer. The checks don’t go to your real printer yet.
The count beside Incoming checks shows how many jobs are waiting, and the newest job opens by itself. If you don’t see a job you just printed, choose Look again.

Check template starts with your default. With automatic numbering, the check numbers usually pick the bank account for you. With manual numbering, choose the bank account and starting check number. With semi-automatic numbering, enter the starting check number.

Under Checks in this print job, choose a check to see it in the preview. A Ready check will print. Any other status means it’s held, but the rest of the job can still print.

The middle check is held because it’s over this user’s limit, so it doesn’t use up a check number.
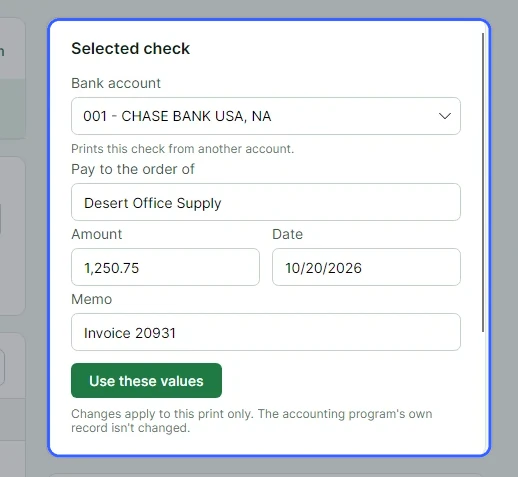
Choose a held check to open its details. You can change the bank account, payee, amount, date, or memo, then choose Use these values. Your accounting program’s record doesn’t change. To leave a check out, choose Skip check.
Under Print settings, choose your MICR printer and the tray that holds your check stock. Load the stock, then choose the print button, which shows how many checks are ready. MultiCHAX records them in Transactions and moves on each account’s next check number.

Held checks aren’t lost. After you print, MultiCHAX saves them as a new print job with “-held” at the end of its name, so you can fix them later. Skipped checks aren’t kept.
| Status | What to do |
|---|---|
| No amount | Enter the amount with Change check, then fix the amount’s position in your template |
| Over your limit | An administrator can raise the user’s limit in Users & permissions |
| Choose a bank account | Choose one for the whole job, or for this check |
| No bank account 002 | The check number points to an account that doesn’t exist or that you can’t use, so choose another |
| Type the starting number | Manual and semi-automatic templates need a starting check number |
Print checks from the PDFs that QuickBooks Online, Xero, and other programs save, on your check stock with your bank account’s MICR line and their voucher stubs.
From your accounting program, save the checks as a PDF, the way you would to print them. MultiCHAX can read a PDF that contains text and has US Letter pages, with either one check (and up to two stubs) or three checks on each page. It can’t read scanned checks.
You also need a check template that matches the PDF. A new database includes ready-made ones: QuickBooks Online, QuickBooks Online – Payroll, and Xero. If yours is missing, add it from Check templates.
Open Import from PDF. Choose Add PDFs… or drag files onto the page. You can add more than one. They appear under PDF sources, which you can open to see each file’s pages and layout, or to Remove a file.

Choose Analyze. MultiCHAX locates each check and reads its payee, amount, written amount, date, check number, address, and memo. When it finishes, you see a message such as “Found 5 checks. Review the ones that need it, then print.”

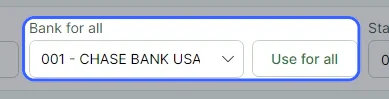
Select the account under Bank for all, then choose Use for all. If any ticked checks have a different bank account already, MultiCHAX asks whether to Change them too or Keep their bank account.
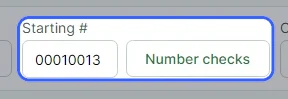
QuickBooks Online payroll checks and Xero checks come without a check number. Starting # begins at the bank account’s next check number. Choose Number checks to number the ticked checks that have none. You see a message such as “Numbered 5 checks: 00010013 to 00010017.” Make sure these numbers match your check stock.
Check template has to match the PDF. The check must be in the same position on the page, and only a three-per-page PDF can use three per page. If they don’t match, the checks are blocked with a message such as “The PDF has the check at the top of the page, but the check template prints it at the bottom. Choose a matching check template.”

The Checks list marks each check Ready, Needs review, or Blocked. The filters above the list show one kind at a time. Choose a check to see what MultiCHAX read under PAYMENT DETAILS, and correct any field. Click a field to see where it was read on the source page. Then choose Confirm & next for a check that needs review, Next to move on, or Skip.
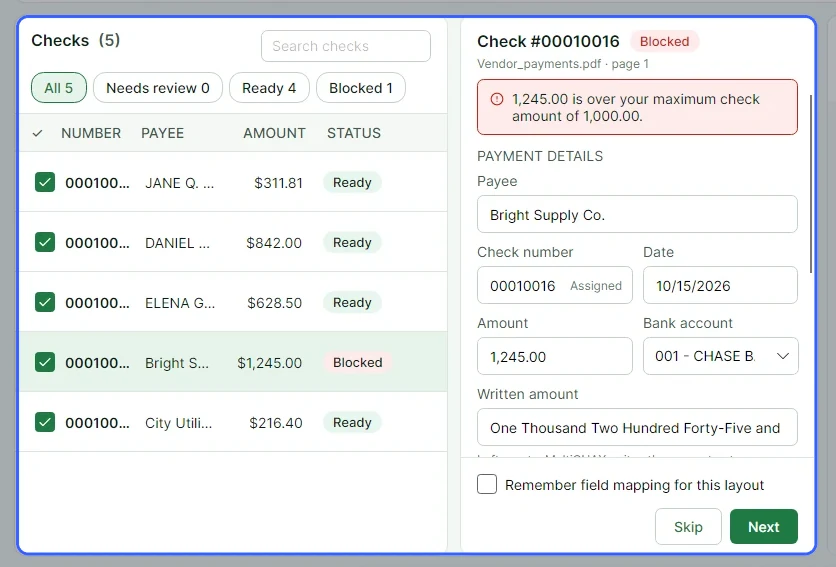
Red blockers have to be fixed before the check can print. Yellow review items need your confirmation once you’ve looked at them.
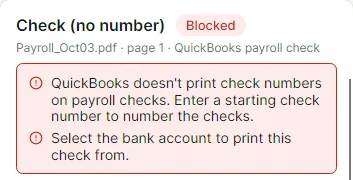
A blocked check lists what you need to fix.
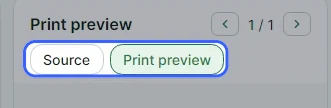
The right-hand column switches between Source, which is the page from your PDF, and Print preview, which is the page as MultiCHAX will print it.
Select the printer at the bottom and choose Print 5 checks…. All ticked checks must be ready, so untick any you want to leave out. MultiCHAX prints one job per bank account. It asks first, with the printer and total, for example “Print 5 checks from 001 – CHASE BANK USA, NA?”
After printing, it asks Did all the checks print correctly? Choose Yes, record them. If a page jammed or misprinted, choose No. Nothing is recorded, and you can print them again.

Did you have to correct fields because a PDF’s fields weren’t read in the right places? Tick Remember field mapping for this layout before you confirm. MultiCHAX saves where the fields are on this check, along with its bank account, and reads the next PDF with this layout the same way.

| Message | What to do |
|---|---|
| QuickBooks doesn’t print check numbers on payroll checks. … | Enter a Starting # and choose Number checks. |
| Select the bank account to print this check from. | Pick it under Bank for all, or in the check’s Bank account box. |
| 1,245.00 is over your maximum check amount of 1,000.00. | The signed-in user’s largest check is lower than this amount. An administrator can raise it in Users & permissions. |
| The PDF’s MICR line shows a different routing number than the selected bank account. | Pick the bank account this check belongs to. |
| Check number 1050 on this account was already printed on … | Confirm only if you intend to print it again. If not, skip it. |
| MultiCHAX can only import PDFs that contain text; scanned checks aren’t supported. | Go back to your accounting program and save the checks as a PDF, not a scan. |
For more, read Fix Import from PDF problems.
MultiCHAX creates a new check face from the values it read. It adds your bank account’s details and MICR line and uses the positions your check template sets. Stubs are copied from your PDF unchanged. The exception is the QuickBooks Online template, which redraws a stub holding a table of bills paid as a neat table. A stub with no table, or one that doesn’t fit, is copied as it came. Three-per-page PDFs print check faces only, three to a sheet.
The check’s position in the PDF (top, middle, bottom, or three per page) has to match the template, because stubs are copied from that same place on the page.
Printed checks go into Transactions, marked as coming from your accounting software. Each bank account’s next check number moves past the numbers used and never moves backwards. To get a protected PDF instead of printing, use Save PDF… on the ticked checks. They’re recorded the same way and count toward the month’s checks.
Before printing, MultiCHAX checks three things: the edition’s monthly check limit, each check against the user’s largest check, and whether the user may print from each bank account.
Write one check by hand without your accounting program: pick the bank account, fill in the payee and amount, review it, then print it or save it as a PDF.
In MultiCHAX, the payee receives the money and is named after “Pay to the order of”. The payer is the holder of the bank account, printed at the top left of the check. The bank account you pick sets the payer, so you can’t type over it.
You need a check template and a bank account with its routing and account numbers. If Write check isn’t in your sidebar, your user lacks the Print manual checks (Write check) permission. An administrator can turn it on in Users & permissions.
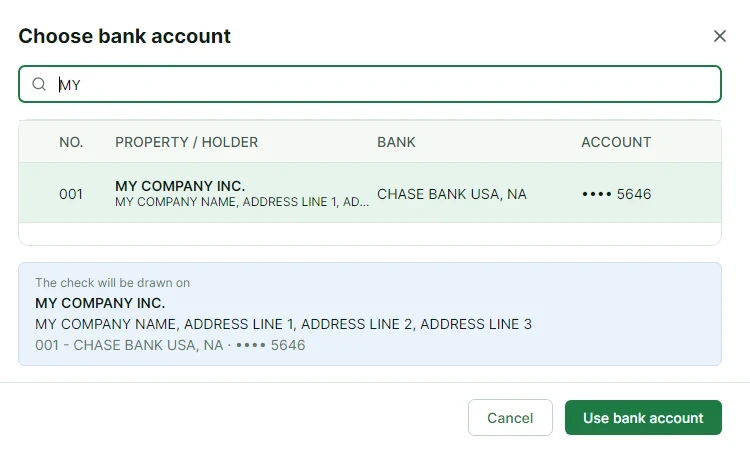
Go to Write check and choose the Bank account box, or press Ctrl+B. Search by the property or holder’s name or street, the bank, the bank number, or the last 4 digits of the account. The callout at the bottom names the account the check will be drawn on. Check it, then choose Use bank account. MultiCHAX only picks an account for you when you may use one and no others.
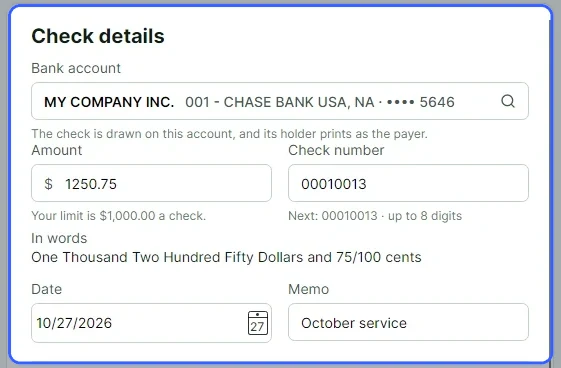
Type the Amount, such as 1250.75, and MultiCHAX writes it out under In words. Check number begins at the account’s next check number, and the hint gives that number and whether the account uses 6- or 8-digit numbers. Date begins at today. Memo holds up to 50 characters.

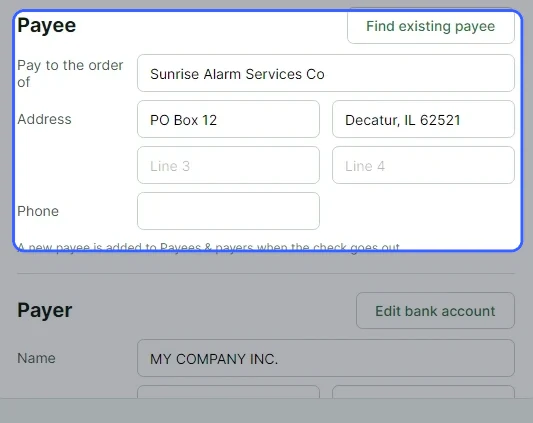
Type the name in Pay to the order of, with up to four address lines and a phone number. To use a saved payee, choose Find existing payee. The default payee is already filled in. A new payee joins Payees & payers when the check goes out.
The name and address under Payer come from the bank account’s holder. Administrators can change them with Edit bank account.
Under Print settings, pick the Check template, which sets where each field prints, along with the MICR printer and Check tray. As you type, Check preview shows the check at 100% scale.

Choose Review & print, or press Ctrl+P. The review asks Is this check correct? and shows the check, a summary such as “Check 00010013 to Sunrise Alarm Services Co for $1,250.75”, the printer, and the account under DRAWN ON. Tick I’ve checked this check: it’s drawn on the right property’s bank account, to the right payee, for the right amount. Load check stock and choose Print check.
Under Other ways to send it, choose Export PDF…. It starts with the same review. Read Save checks as PDFs.
MultiCHAX checks the form when you choose Review & print. Each problem appears under its field and in a banner at the top.

| Message | What to do |
|---|---|
| Choose the bank account the check is drawn on. | Choose the Bank account box and pick an account. |
| Enter the amount, like 1250.75. | Type an amount above $0.00. |
| The most … can write a check for is $1,000.00. | The amount is over this user’s largest check. Ask an administrator to raise it, or have someone with a higher limit write the check. |
| Enter a check number of up to 8 digits. | Use only digits, with no letters or spaces. Accounts set to 6-digit check numbers take up to 6. |
| Check 1050 was already printed from this account on … | This account has used that number. Use the next number the message gives. |
| … has no routing or account number for the MICR line. | An administrator adds them in Bank accounts. |
| Your Standard edition prints 300 checks a month … | You’ve used all of this month’s checks. Read Editions compared. |
Transactions records the check, as coming from Write check, once it goes to the printer, saves as a PDF or is accepted by the mail server. At that point the account’s next check number moves on, the payer is saved, and any new payee is added. The form keeps the bank account and clears the payee, amount and memo for your next check.
A duplicate is a number already used on the same bank account. MultiCHAX stops it before printing, so your bank never sees two checks with one number.
With a template that prints three checks per page, Write check uses the top position on the sheet.
Use for a new check in Transactions and Write a check in Payees & payers both bring you here with the payee, payer, amount and memo filled in. The check number and date are new.
Print checks with your bank account’s name, address, check number and MICR line, then write in the payee, amount and signature by hand.
A blank check has a real MICR line, so handle it like a signed check and keep it locked away. If Blank checks isn’t in your sidebar, your user lacks the Print blank checks permission. An administrator can turn it on in Users & permissions.
Go to Blank checks. Bank account shows the first account you may use. Change it if you need a different one.

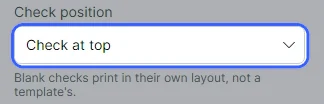
Match your check stock under Check position: Check at top, Check in middle or Check at bottom. Blank checks use their own layout and not a template’s, and print one check per sheet.
Starting check number begins at the account’s next check number. In Number of sheets, type how many checks you want, up to 500. The bar at the bottom shows the range, such as “25 checks, numbers 00010013 to 00010037, one per sheet.”

Print lines for the date, payee, amount, memo and signature gives the writer lines to fill in. Print DOLLARS after the amount in words ends the amount line with DOLLARS. Both start on. Turn off any that your stock already has.

Pick the MICR printer and the Check tray that holds your check stock. The preview shows the first check on a Letter page at 100% scale.
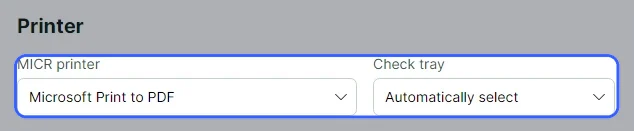
Load check stock and choose Print blank checks. MultiCHAX then confirms the range of check numbers and where they went.

| Message | What to do |
|---|---|
| Check 1050 was already printed from this account. Start at 1051 or later. | This account has used some of the numbers. Start at the number the message gives. |
| Enter how many checks to print, from 1 to 500. | Type a number of sheets from 1 to 500. |
| The last check number would have more than 6 digits. | The account uses 6-digit check numbers. Start at a lower number, or print fewer checks. |
| … has no routing or account number for the MICR line. | An administrator adds them in Bank accounts. |
| Your Standard edition prints 300 checks a month; … | Print fewer checks, or read Editions compared. |
Because blank checks skip the check template, they don’t pick up its captions, logo or signature placement, or the bank account’s second signature line. The position starts where your default template puts the check. A three-per-page template starts at the bottom, because blank checks print one per sheet.
Transactions saves each one as a blank check with no payee or amount. The account’s next check number moves on by the number printed. The previous version of MultiCHAX did neither.
See what prints on each check, where each part comes from, and how the MICR line, signature lines, images, stubs and check positions work.
| Part | Where it comes from |
|---|---|
| Payer (account holder) and address | Account holder and its address lines in Bank accounts. |
| Logo | The bank account’s logo image, placed at the template’s logo position. |
| Bank name and transit number | The bank account’s Bank name, with the Transit number under it. That’s the fraction, such as 50-1058/214. |
| Check number | The print file, or the bank account’s next check number. |
| Date | The print file, or the date you enter. |
| Payee | Who the check pays, named after “Pay to the order of”, with the address below. |
| Amount | The amount in figures. The secure amount font (Enterprise) prints it in a font that’s hard to change by hand. |
| Amount in words | MultiCHAX writes it out, or reads it from the print file. |
| Memo | The print file, or the memo you enter. |
| Second signature line | Prints with its message above it, and only when the amount reaches the bank account’s From amount. |
| Signature line | The template’s signature line, plus the bank account’s signature image if it has one. |
| MICR line | The check number, routing number and account number in magnetic ink. Details follow below. |
The check template sets where each part prints and in which font. Read The template designer.
Bank sorting machines read the numbers along the bottom of the check, which print in the E-13B MICR font. MultiCHAX puts them in the clear band, the strip along the bottom of the check face, in this order:

| Field | Printed as | Notes |
|---|---|---|
| Check number | ⑈00010013⑈ | Sits between two on-us symbols. Zeros pad it to 6 or 8 digits, following the bank account’s Check number in the MICR line setting. |
| Routing number | ⑆021410585⑆ | The 9-digit routing (transit) number of the bank, between two transit symbols. |
| Account number | 987-654-321 | Prints as entered in the bank account’s Account number, 4 to 17 characters. |
Use a laser printer with MICR toner, at 100% scale. If the line falls outside the clear band, change the MICR line position in Check alignment.
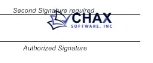
Each bank account has either One signature line or Two signature lines. With two, you enter a From amount and a Message over the second line, such as “Two signatures required”. A check at or above that amount gets a second line above the usual one, with the message centered over it. This happens even if the template turns off its own signature line.
| Image | Where it prints |
|---|---|
| Logo | At the template’s logo position, usually the top left of the check. |
| Signature | On the signature line. Scan it on a white or clear background. |
| Overlay | Behind the check, as a full-page background such as a watermark. |
You add these per account in Bank accounts, as PNG, JPEG, BMP or GIF files.
All pages are US Letter. The check template decides where the check sits and what else is on the page:
| Setting | Choices |
|---|---|
| Check on the page | Check at the top, Check in the middle, Check at the bottom, or Three checks per page. |
| Stubs | One stub, Two stubs, or Z-fold. The stub text comes from the print file, between the template’s stub top and bottom lines. |
| Bill table (QuickBooks Online) | Print stubs as a table of the bills paid redraws the bills on each stub as a table. |
Positions on the check are in hundredths of an inch from its top-left corner. The clear band starts 2.875 inches down the check face. Fields stay above it, so only the MICR line prints in the band.
With Copies of each check, a bank account can print more than one copy. Extra copies print as a separate job.
Save a check or a batch as a protected PDF instead of printing it.
| Where | Button | Result |
|---|---|---|
| Write check | Export PDF… | Saves the check as Check 00010013.pdf. The save window starts in the PDF folder. |
| Import from PDF | Save PDF… | Puts the ticked checks in one protected PDF instead of printing them. |
| Transactions › Reprint | Save as PDF… | Saves a copy of a check you already printed. No second record is made. |
| Incoming checks | Save preview PDF… | Makes a PDF for viewing only, with VOID across each check. MultiCHAX records nothing. |
In Write check, complete the check the same way you would for printing.
Choose Export PDF… under Other ways to send it. In the review that opens, tick I’ve checked this check: … and choose Export PDF… again.

The save window opens in the PDF folder set in PDF security. After saving, MultiCHAX tells you where the check went.

Save PDF… in Import from PDF follows the same pattern for every ticked check that’s ready. The file gets a name like Checks_20261027_1430.pdf.
AES-256 encrypts every PDF of a check, with the permissions and password from PDF security. Nobody is allowed to change the check itself.
When the MICR printer is a PDF printer such as Microsoft Print to PDF, Incoming checks doesn’t ask where to save. The checks go to the PDF folder as Export_MM_dd_yyyy_hh_mm_ss.pdf.
Talk to the support team, or browse all MultiCHAX 11 help.
Contact Support All MultiCHAX 11 Help