Printing your own checks has become increasingly popular in recent years, providing individuals and businesses with a convenient and cost-effective method for managing financial transactions. By incorporating modern technology and utilizing specialized materials, anyone can print their checks securely and efficiently.
However, before diving into the world of check printing, it’s crucial to understand the necessary requirements and considerations. In this article, we will explore what you need to know and have in place before printing your own checks, ensuring a secure and hassle-free process.
To print your own checks, you’ll need:
- A printer
- Check printing software
- Check stock paper
- Magnetic ink
- MICR font
1. Printer:
Printing your own checks doesn’t necessarily require a specific type of printer. Whether you have an inkjet, LaserJet, or even an offset printer, you can use it to print checks. While some check printers offer additional security features like watermarks or thermochromic ink, a basic home-office printer can still suffice. The key requirement is compatibility with the magnetic ink used for the MICR code. Alternatively, you can outsource the printing of the MICR code to a check printing company. This way, you can simply insert the pre-printed checks into your own printer to add the necessary details without the need for special ink or downloading a MICR font.
2. Check Printing Software:
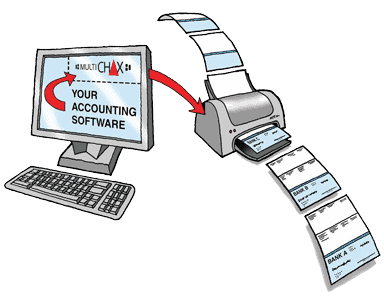
Check printing software is a crucial tool for accurately designing and printing checks. With customizable templates, this software simplifies the process of adding bank information, payee details, and the amount. It also ensures proper alignment of various elements, including the vital MICR line, which is essential for automated check processing. Explore options from different software vendors, including online check writing software and alternative software providers, to find the best fit for your needs.
3. Check Stock Paper:
Ensuring the security and authenticity of your printed checks requires specialized check stock paper. Look for stock paper with security features such as watermarks, microprinting, and tamper-evident patterns, which deter forgery attempts. You can find suitable check stock paper at most office supply stores, online retailers, or through dedicated check printing companies.
4. Magnetic Ink:
For the MICR line on your checks, which contains critical banking information like routing numbers and account numbers, it is essential to use magnetic ink. Magnetic Ink Character Recognition (MICR) technology enables accurate scanning and processing of checks by magnetic ink character readers. Purchase magnetic ink cartridges or toners designed for your specific printer model, ensuring compatibility and optimal performance.
5. MICR Font:
In addition to magnetic ink, selecting the correct MICR font is crucial for check readability. MICR fonts feature unique characters recognized by MICR readers, enabling seamless check scanning and processing. Choose a MICR font that complies with industry standards to ensure compatibility and accurate scanning of your checks.
6. Counter Check:
In addition to standard check printing, you can also consider the option of counter checks. Counter checks are temporary checks issued by your bank while you wait for pre-printed checks. They are usually printed on regular paper and include essential details such as your account number, routing number, and bank’s fractional number. Counter checks can be useful when immediate payment is necessary, but it’s important to check with your bank regarding any specific requirements or limitations.
Printing your own checks offers convenience and cost-effectiveness, but it’s crucial to prioritize security and compliance. To ensure this, you’ll need a reliable laser printer, dedicated check printing software, specialized check stock paper with security features, magnetic ink for the MICR line, and the appropriate MICR font. By following these guidelines, you can print personal checks that meet industry standards. Remember to always adhere to best practices and legal regulations to maintain the integrity of your financial transactions. With the right tools and materials, printing your own checks becomes a seamless process, allowing you to take control of your finances while enjoying the benefits of personalized and secure payment solutions.
Steps on How to Print Your Own Checks
Now that you understand the process and have all basic check printing materials and to meet the necessary standards, Here is a comprehensive step-by-step guide on how to print your own checks at home.
Printing your own checks at home can be a convenient and cost-effective solution. Here’s a step-by-step guide:
1. Get check printing software:
Invest in reliable software for designing and customizing checks.
2. Load Check Stock Paper:
Purchase paper with security features compatible with your printer. Insert the specialized paper securely in the printer’s tray.
3. Install MICR font:
Install the font recognized by MICR readers for accurate processing.
4. Enter check information:
Input payee details, date, payment amount, routing number, and account number.
5. Design the check layout:
Customize the layout or use templates provided by the software.
6. Review and Print the check
Print draft checks and review everything to ensure all your details are correct. Check alignment and layout by doing a test print on regular paper, and make sure to use magnetic ink for the MICR line to ensure accurate processing by financial institutions.
7. Verify check quality:
Ensure legibility and accuracy, with no smudges or misalignment.
8. Sign the check:
Sign the printed check in the designated signature line using your authorized signature. Ensure that the signature matches the one on file with your bank.
9. Record check details:
Make a record of the check in your check register or accounting system. Include the check number, payee, date, and amount for accurate record-keeping.
10. Store securely:
Store the printed checks in a secure location to prevent unauthorized access or tampering.
By following these steps, you can print checks at home securely and conveniently.
