How Can We Help?
MultiCHAX User Manual
Overview
The MultiCHAX system is composed of 2 parts:
-
The executable program (MultiCHAX.exe)
-
The virtual printer (MultiCHAX Virtual Printer)
The executable program, MultiCHAX.exe, is used for the setup of your checks and bank accounts. As you print your checks from your accounting software, check data to MultiCHAX.exe from the print driver to produce your MICR encoded checks.
The MultiCHAX Virtual Printer driver is used for converting the text output of your printed checks from the accounting software, and stores them in a temporary cache under the C:\MultiCHX\Temp\ file directory. Files are saved with the prefix, AAA*. Normally, when the virtual driver starts to receive output, it will automatically start the MultiCHAX program. The information saved is used by MultiCHAX to create a “virtual print image” in computer memory.
The MultiCHAX program uses the information you have set up in the control setting (also known as the check template) to examine this virtual print image, getting the data it needs to print a check by looking for the row (vertical position) and column (horizontal position) coordinates for each check data field.
Hardware and Software Requirements
MultiCHAX system requirements are:
-
Windows 7, 8, 8.1, 10, 11 (Windows XP and Vista are no longer officially supported)
- x86 & x64 – based processor (ARM based not compatible)
-
100 MB (megabytes) disk space
-
Minimum screen resolution: 1024 x 720
-
Laser printer with True Type fonts support
Mac OS X is not officially supported, however, MultiCHAX can work in a virtual desktop environment, such as Parallels Desktop for Mac.
If using MultiCHAX with a remote desktop service, please visit MultiCHAX Remote Desktop Setup
Setup: Installation
-
After downloading MultiCHAX, double click on the setup file, called “mchax.exe”
-
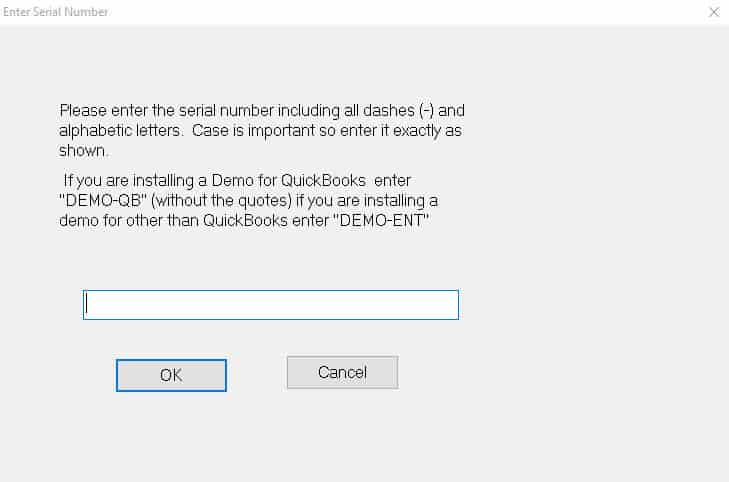
If using the demo/trial version of MultiCHAX, please enter “DEMO-QB” if you are using QuickBooks, else enter “DEMO-ENT” (no quotes; all caps) in the serial number field, otherwise enter your serial number in all caps
-
Click “Finish” to end the installation
Setup: After Install
-
Double-click the MultiCHAX desktop icon to start the MultiCHAX program
 Alternatively, you may open the link from Start > All Programs > Chax Inc > MultiCHAX
 -
By default, manual bank selection is enabled, when the popup asks “You must manually select a bank in MultiCHAX,” click cancel twice.
-
Click on “SETUP” from the main menu
-
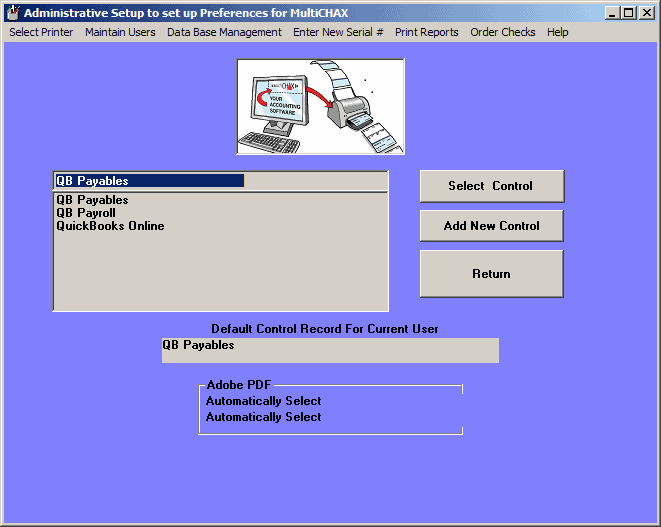
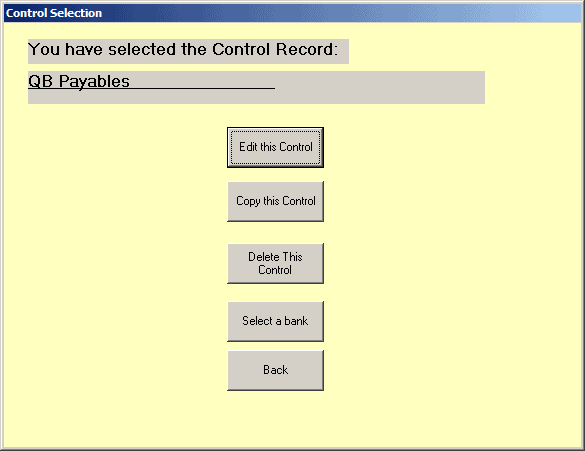
Double click on the default control (the default control is displayed under “Currently selected Control”)
-
Click on “Edit this Control”
-
Choose a check form setting from “Check Placement on Form” – select either: top, middle, bottom, 3, 3std (this is how your check will print)

-
Click “OK & Save”
-
Click “Select a bank”

-
Click on the account “001 – Starter Bank Name”
-
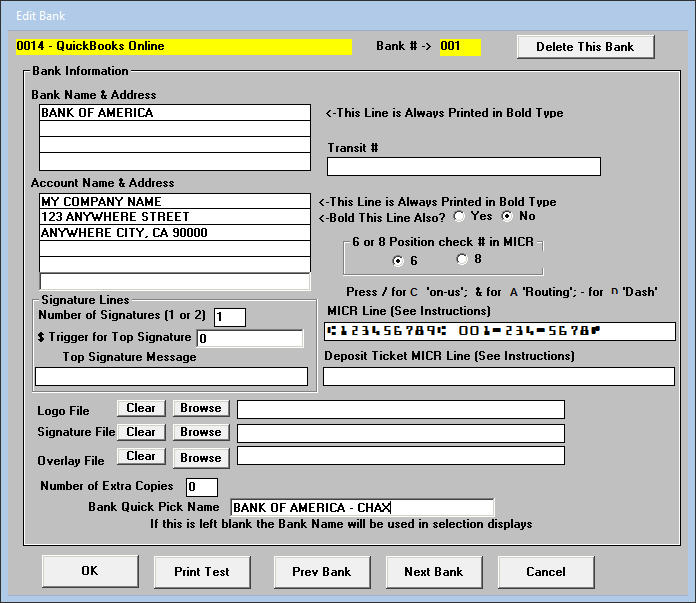
Enter your bank account information
-
Complete the MICR Line in this format (replace the routing and account numbers with your bank account info)
 [routing symbol] [routing number] [routing symbol][account number] [on-us symbol]
 -
Browse for a logo and signature file (optional)
-
Click “OK” to save the bank account
Setup: Creating a Grid
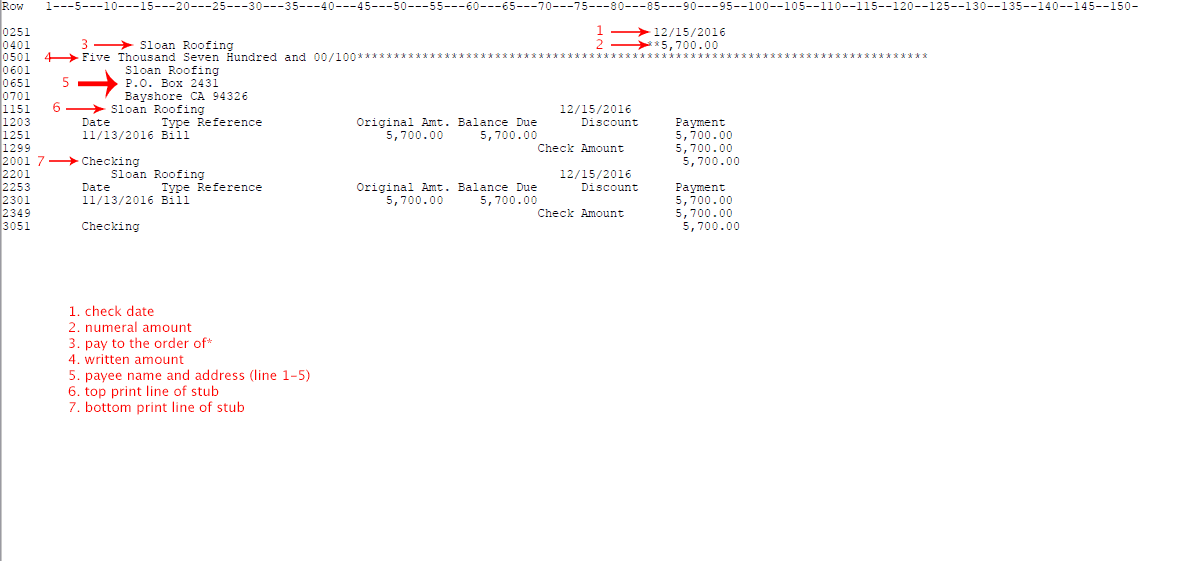
The image below is called a “grid.” Check field coordinates (rows and columns) are manually entered in the control setting of MultiCHAX during the initial setup.
Example grid multichax-quickbooks-grid-sample.pdf
To generate a grid:
-
Launch MultiCHAX.exe
-
Select “TESTS” from the main menu
-
Choose “grid toggle” to enable the grid mode
-
Print a check from your accounting software and choose the MultiCHAX Virtual Printer
Setup: Entering the Grid Coordinates
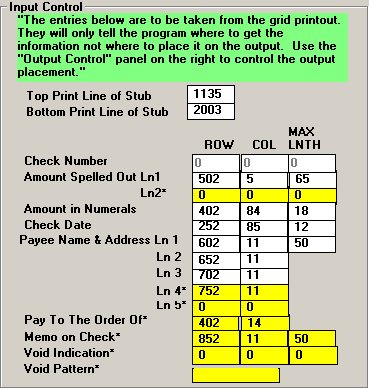
Now that you have grid in hand, we must use it to enter the field coordinates in the INPUT CONTROL section of the template.
To change your input control settings:
-
Launch MultiCHAX.exe
-
Click on “SETUP” from the main menu
-
Double click on the default control (the default control is displayed under “Currently selected Control”)

-
Click on “Edit this Control”

-
Manually enter the row and column coordinates for each field, such as the check date and amounts
-
Save your settings
Setup: Modifying the Check Template
There are several sections to modifying the check printing and layout within the control record:
-
Set MICR Offsets
-
Set Descriptive Printing
-
Check Placement on Form
-
One Stub or Two
-
Output Control
Set MICR Offsets
The MICR Offsets adjusts the horizontal and vertical printout of the entire check form to paper. By default, the settings are (0, 0) and both settings can be either positive or negative (enter with a “–” dash sign.) The settings are adjusted in inches.
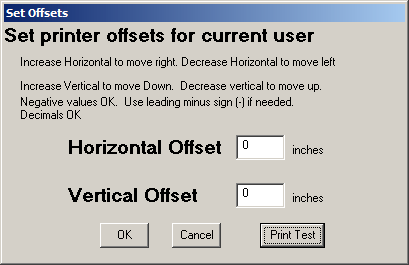
To move the page to the right, adjust the horizontal offset by 0.1 increments. To move the page to the left, subtract from the horizontal offset.
To move the page down, adjust the vertical offset by 0.1 increments. To move the page up, subtract from the vertical offset.
For example, a horizontal offset of 0.25 will move it to the right by 0.25 inches and a vertical offset of -0.10 will move it up 0.10 inches.
Set Descriptive Printing
The Set Descriptive Printing section controls the pre-printed check wordings such as: “DATE,” “AMOUNT,” and “PAY TO THE ORDER OF.”
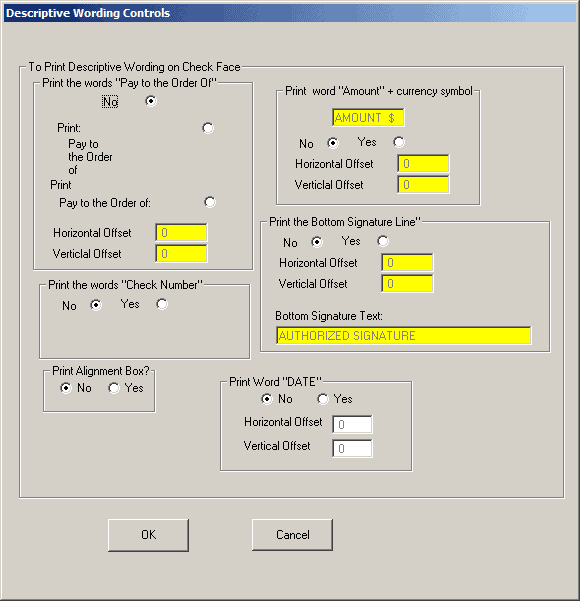
Enable or disable the printout of each field. You may also adjust the horizontal and vertical offsets for the fields. Each setting is in inches.
Check Placement on Form
The Check Placement on Form controls the “look” of the printed. By default, the template will print checks on top with 2 stubs on the bottom.

MultiCHAX will now print 3-checks-per-page in two different styles:
-
select 3 for 3 checks per page with sizes 3.5“, 3.5” and 4.0“ checks
-
select 3Std for 3 checks per page standard format with a 1/2” tear-off, sizes 3.5“, 3.5” and 3.5“ checks
One Stub or Two
This selection gives you the option of switching between one or two stubs. Select two stubs if you wish to print a duplicate stub on the face of the check. You might wish to keep this extra copy for your records.
Output Control
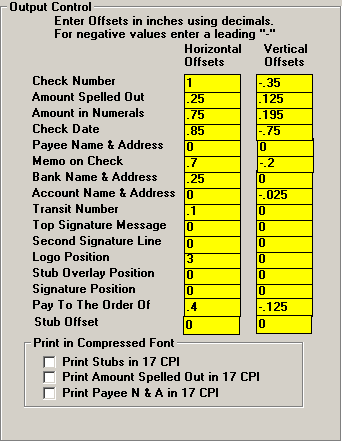
The Output Control tells MultiCHAX where specific fields of information will be placed on the check you print out. By default, most of the output control settings are set to zero (0) and should be fine for most people. Each field is adjustable to your preference and will need some trial and error. To be more precise, print a test page using the default settings, then use a ruler to measure the distance you wish to move either vertically or horizontally. Each field is moved using inches, and you will rarely use anything greater than 1.0 inches, so make changes in 0.1 increments.
Enabling the Print in Compressed Font feature will cause the related field to be printed using a smaller monospaced font instead of the default fonts.
Setup: Bank Accounts
Add More Bank Accounts
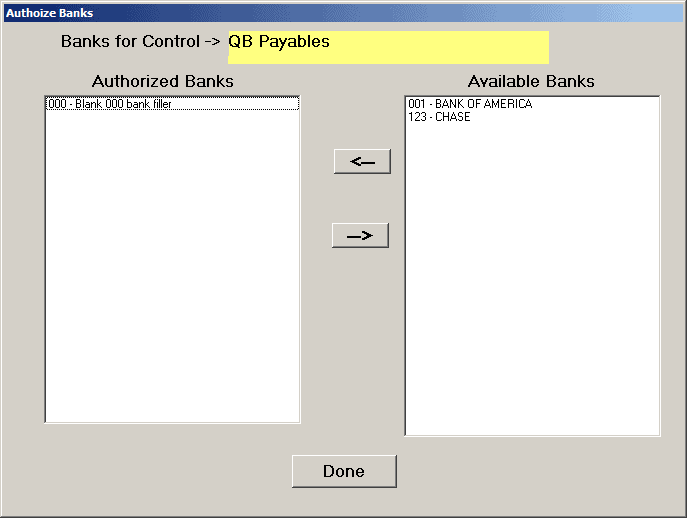
Depending on the version of MultiCHAX that you purchased, you may have a limit to the number of bank accounts you can add to MultiCHAX. The minimum amount is 5 bank accounts.
To add bank accounts:
-
Launch MultiCHAX.exe
-
Click on SETUP from the main menu
-
Double click on your default control
-
Click on Select a Bank
-
Click Add Bank
-
Enter a unique 3 digit number when prompted for “Enter Bank Number to Add” (default is 001). If you receive a warning about the bank number being less than 100, it is safe to ignore for most situations. Read more about it in “Method of Bank/Check Selection”

-
Enter your transit number (optional) which look like 123-45/6789
-
Toggle between 6 or 8 check number digits to be printed
-
Enter your MICR line
-
Use & (shift+7) to create the routing symbol
-
Use / to create the on-us symbol
-
Use – to create the dash symbol
-
-
Complete the MICR Line in this format (replace with your actual routing and account numbers)

-
Browse for a logo file (optional) – max print size limit is 1” x 1“
-
Browse for a signature file (optional) – max print size limit is 3.5” x 0.75“
-
Browse for an overlay file (optional) – 8.5” x 11“ letter size image, can be used for multiple signature images or logos, graphics and more
-
Change the number of signature lines from 1 or 2 (optional)
-
Trigger a second signature line for a certain dollar amount (optional)
-
Enter your deposit ticket MICR line (optional)
-
Enter the number of extra copies (optional) to be printed to plain paper
-
Enter your bank quick pick name (use a descriptive name for manual bank selection)
-
Click “OK” to save the bank account
Note: When entering the MICR line numbers, enter only the transit and account numbers. Do not enter the check number. Your MICR line should be entered like so:
&028000121& 999-123456/
Method of Bank/Check Selection
MultiCHAX offers three different Methods of Bank Account Selection:
-
Manual
-
Semi-Auto
-
Automatic
Manual Mode
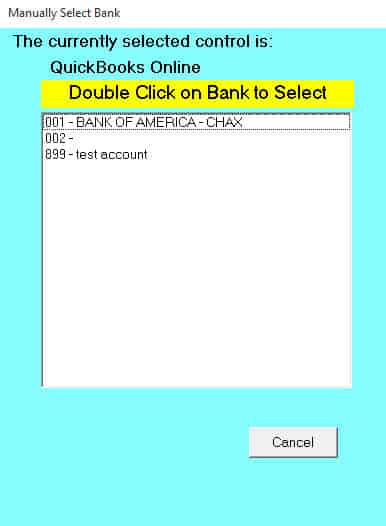
The default selection is Manual mode, in which the user is asked to manually select a bank account for each check run and will also be asked to confirm or change the starting check number.
Semi-Auto Mode
For QuickBooks, Quicken, QuickBooks Online users, MultiCHAX can automatically select the bank account for you, but you will need to confirm the starting check number for each printed batch of checks. This feature is available by toggling the “Semi-Auto” method of check selection.
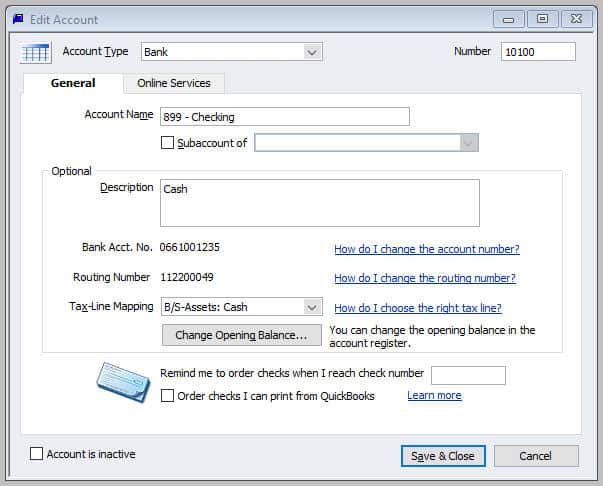
To use this feature, you must add your unique 3 digit bank code (used when you added your bank account in MultiCHAX) somewhere in QuickBooks/Quicken. For most users, you can add this in the chart of accounts header name.
Steps to enable Semi-Auto mode in QuickBooks/Quicken:
-
Log into QuickBooks / Quicken
-
Open the Chart of Accounts
-
Choose the checking account that you use to print checks from, right click and select EDIT ACCOUNT
-
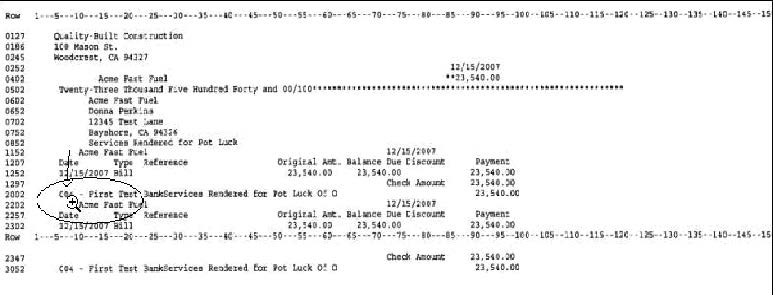
Launch MultiCHAX.exe and enter the correct row and column of the unique 3 digit bank code printed on your grid
Automatic Mode
If your accounting program can print a check number on the output check (does not apply to QuickBooks or QuickBooks Online) then MultiCHAX can automatically select the bank account. This feature is available by toggling the “Automatic” method of check selection.
How Does Automatic Bank Selection Work?
The automatic bank selection method works by reading the check number of your printed check, and MultiCHAX will then select the bank account which matches that check number.
This method works best when your check number is 8 or more characters in length. This will let you use the first (left most) 3 digits to designate a bank number, while still leaving at least 5 digits for the check sequential number, and thus you can issue 99,999 checks on a single bank account before you need be concerned about the incrementing of the check number affecting the bank number assigned to the first digits.
Example:
If your unique 3 digit bank code in the MultiCHAX list of bank accounts is 345, we can then assign all your checks printing from that bank account will start with check number 345xxxxxx, where xxxxxx is your current check number.
If your accounting program does not allow eight digits, you will have to compromise the number of digits you use for the bank account or the number of digits remaining for sequential check numbers. A single digit will allow for 9 bank accounts. Two digits will allow for 99 bank accounts. Three will allow for you to assign up to 999 bank accounts to a single control file.
Remember, your accounting program will be unaware of this use of the check number, so you must monitor the use of sequential numbers to prevent corrupting the leading significant digits. For example, if you only have a seven digit check number and use the 3 leading positions as account numbers, this will leave only four digits for sequential numbers, and so you must manually reset the starting check number to 1 before you reach 9,999 checks.
Security – Users
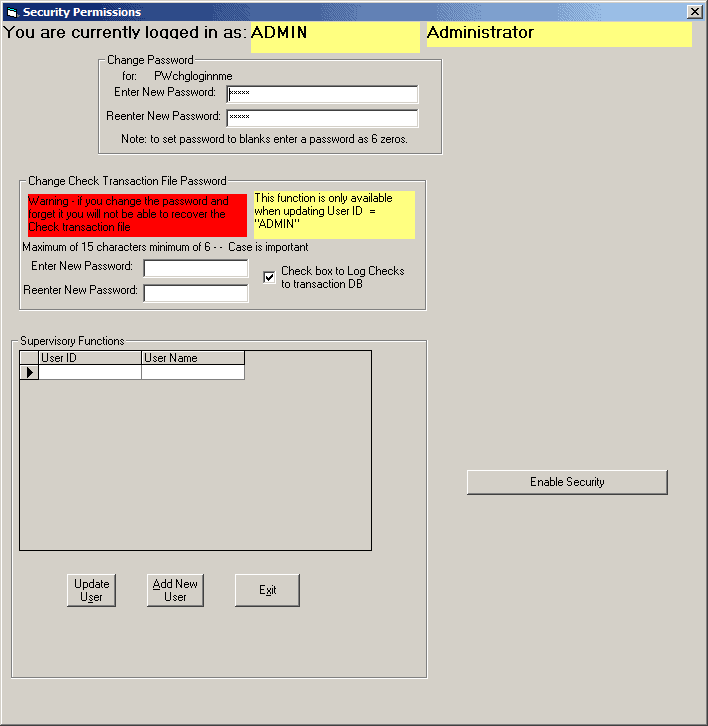
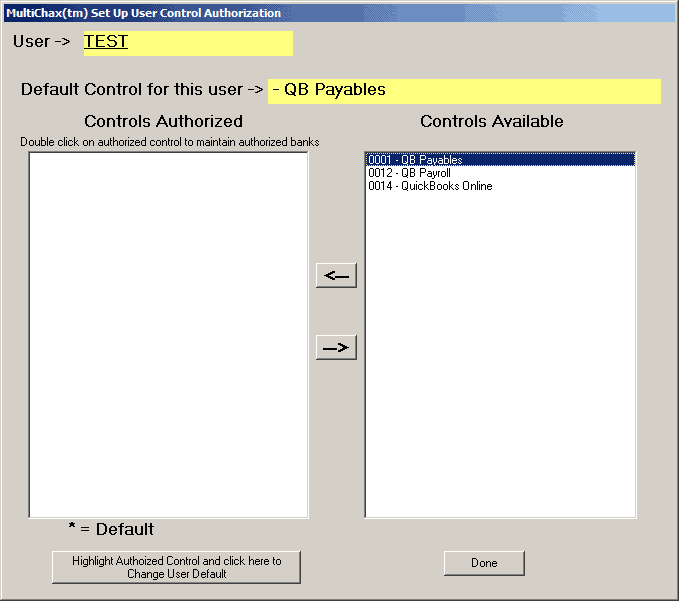
You can add/remove users and enable security measures within the MultiCHAX.exe program by going to SETUP > Maintain Users.
The default user is “admin” and the security is disabled.
To toggle security, click on “enable/disable security”
To change the user password, highlight the username you wish to edit, and click “Update User.” Enter your new password in the “change password” field, and select complete update.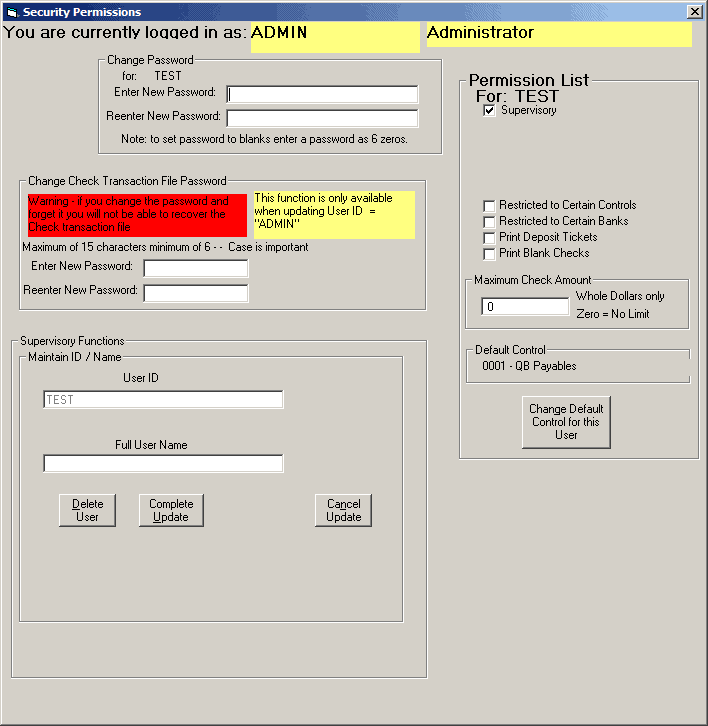
It is recommended that you change the “Admin” password. Be sure to make a note of this password. You will be unable to gain access if you don’t have a password. You may not delete the “Admin” user or change its user ID and it always has supervisory permissions.
Change Password: Enter a new password and then re-enter the same password to ensure typing accuracy. Note if you delete the password or enter no password you will allow the user to sign on without entering a password.
Maintain ID / Name: Enter or change the User ID and the Full User Name (optional).
Permissions List: Mark the permissions granted to the user.
-
Supervisory – grants access to all features; only users with the supervisory setting may access the setup section
-
Print Deposit Tickets – user can print deposit tickets (restricted to certain controls/accounts)
-
Print Blank Checks – user can print blank checks (restricted to certain controls/accounts)
-
Maximum Check Amount – restrict the user to print a maximum check amount; checks over the limit will not print
-
Default Control – change default control for the user
